Chat interfaces dominate the modern workplace: production teams coordinate in threads, approvals happen in emails, and LLM-powered assistants are becoming part of daily operations.
The real problem is proper integration. A message that says "Shot ready for review" should let a supervisor approve that shot and update the status in Kitsu under the correct user in an ideal world, but this would require a small backend service, a secure API connection to Kitsu, and a reliable mapping between chat users and Kitsu users. The good news is, you can already do so with Kitsu!
A simple starting point is a Telegram bot with one command like /hello. The bot links the chat user to their Kitsu account once, then replies through the API and displays them in chat. Whenever an event happens in Kitsu, the bot notified you. That small integration proves the concept, and that's exactly what we're going to build in this article.
Why Custom Messaging Integrations
Custom messaging integrations centralize communication around a single source of truth. Instead of supervisors forwarding emails about a task status change, the update can be pushed automatically to the relevant team channel. For example, when a lighting task switches to "retake" in Kitsu, the lighting Telegram group instantly receives a structured message with the shot name, assignee, and deadline. The production tracker becomes proactive.
User experience improves when raw database events are reshaped into readable summaries. Artists should not need to dig through activity logs to understand what changed. A daily digest sent to a Telegram channel can summarize approvals, new assignments, and upcoming deadlines in plain language. That digest can be generated directly from the Kitsu API and delivered automatically every evening to turn production data into something people actually consume.
Automation is where this approach truly pays off, however. Messaging platforms can act as lightweight command interfaces. A coordinator typing "/late_shots" in Telegram can trigger a query against Kitsu and receive an instant report of overdue tasks. A lead typing "/assign SH010 alice" can trigger a backend call that updates the assignment in Kitsu. Chat becomes an operational surface for the production database.
But as we said, let's start simple with a Telegram bot that interacts with Kitsu.
1. Create a New Telegram Bot
Start by creating a dedicated bot in Telegram. Separation keeps credentials clean and avoids future security headaches when the integration is handed over to production IT.
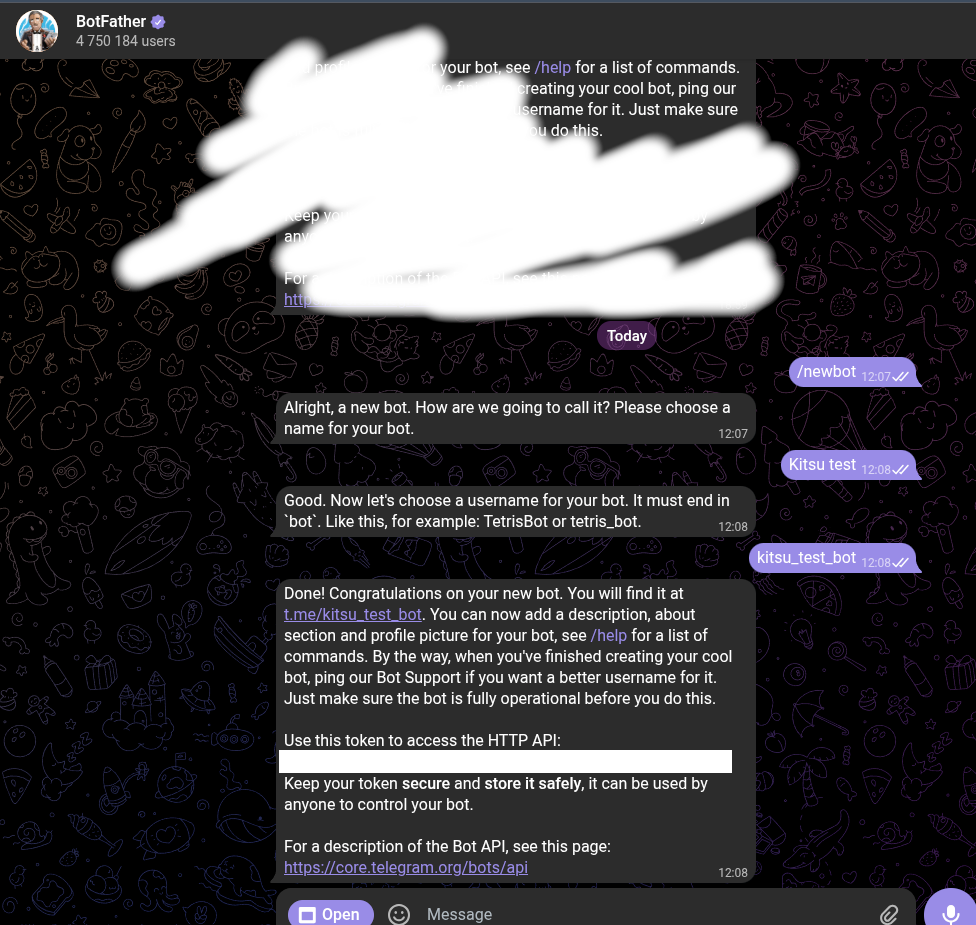
Open Telegram and search for BotFather, which is the official bot for managing other bots.
Initiate a chat and send /newbot. The flow is straightforward: provide a human-readable name like “Kitsu Notifications” and then a unique username such as kitsu_pipeline_bot. The username must end with “bot,” and it has to be globally unique, so expect to try a few variations in a studio environment.
BotFather returns an API token. Treat this token as a production secret, not as a convenience string to paste into Slack or commit to Git. Store it in your environment configuration system. If this token leaks, anyone can send messages as your production bot, which quickly turns from amusing to catastrophic when producers start receiving spam.
Before wiring this into Kitsu’s event system, let's validate the token manually.
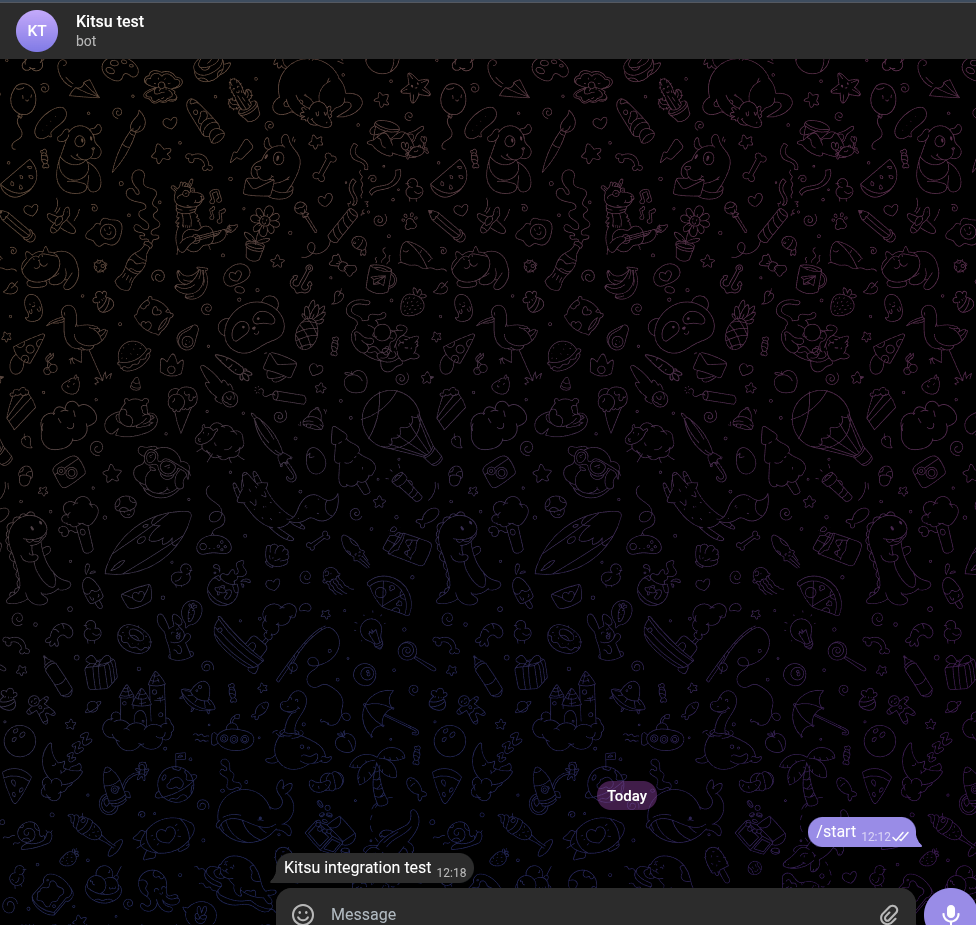
Search for your newly created bot by its username inside Telegram and start a conversation with it. Send a simple "/start" so Telegram registers your chat.
To retrieve your client (chat) ID, call the getUpdates endpoint with curl using the token. For example:
curl https://api.telegram.org/bot<TOKEN>/getUpdates
The response will contain a JSON payload with a chat object and an id field. That numeric ID is what your integration will target. In a real pipeline scenario, this might be the chat ID of a supervisors group rather than an individual user.
Now test outbound messaging directly. Use curl to send a message to yourself:
curl -X POST https://api.telegram.org/bot<TOKEN>/sendMessage -d chat_id=<CHAT_ID> -d text="Kitsu integration test"
If the message appears in Telegram, the token and chat ID are valid. This manual verification step saves hours of debugging later when you plug the same call into a Kitsu event hook and something silently fails.
With the bot validated, the next step is to connect it to Kitsu’s event system so that, for example, when a new asset is created, a message is pushed automatically to the supervisors’ Telegram group.
The exact same sendMessage endpoint you tested with curl becomes part of a small service or serverless function triggered by Kitsu.
2. Set a Kitsu Event Listener
Next, we need to subscribe to real-time events from Kitsu. The objective is simple: react the moment production data changes.
We can use Kitsu's zou Python SDK to open a websocket connection and listen for task update events.
For example, connect to the Kitsu event stream and filter for asset creation events:
import gazu

gazu.set_host("http://localhost:80/api")
gazu.set_event_host("http://localhost:80/api")
gazu.log_in("admin@example.com", "mysecretpassword")


def my_callback(data):
    print("Asset created %s" % data["asset_id"])

event_client = gazu.events.init()
gazu.events.add_listener(event_client, "asset:new", my_callback)
gazu.events.run_client(event_client)
We use the gazu library to connect to a locally hosted Kitsu API server at http://localhost:80/api, authenticate with the provided admin credentials, and then listen for real-time events.
The snippet defines a callback function my_callback that prints the ID of a newly created asset whenever it is triggered.
After initializing an event client with gazu.events.init(), the script registers the callback to listen for the "asset:new" event (which fires whenever a new asset is created in the system).
gazu.events.run_client(event_client) starts the event loop that keeps the script running so that each time a new asset is added to Kitsu, the callback executes and prints its asset_id.
3. Use the Telegram API to Send a Message
With events flowing in, push messages out using Telegram’s sendMessage endpoint like we did earlier for testing. The API is just an HTTP POST that includes the bot token, chat ID, and text payload.
Encapsulate that in a small utility function:
import requests
import os

TELEGRAM_BOT_TOKEN = os.getenv('TELEGRAM_BOT_TOKEN')
TELEGRAM_CHAT_ID = os.getenv('TELEGRAM_CHAT_ID')

def send_telegram_message(text):
    url = f"https://api.telegram.org/bot{TELEGRAM_BOT_TOKEN}/sendMessage"
    payload = {
        "chat_id": TELEGRAM_CHAT_ID,
        "text": text,
        "parse_mode": "Markdown"
    }

    response = requests.post(url, json=payload, timeout=5)

    if not response.ok:
        raise RuntimeError(
            f"Telegram API error {response.status_code}: {response.text}"
        )
Note that we defined secret environment variables to prevent persisting them in a Git repository.
Then call it from the event callback:
from your_telegram_module import send_telegram_message

def my_callback(data):
    send_telegram_message("Asset created %s" % data["asset_id"])
To test our event listener:
TELEGRAM_BOT_TOKEN=<TELEGRAM_BOT_TOKEN> TELEGRAM_CHAT_ID=<CHAT_ID> python server.py
4. Receiving Messages with a Custom Kitsu API Endpoint
Notifications are useful, but bidirectional communication is where the integration becomes truly useful.
To do so, we need to extend the Kitsu backend with a custom plugin that registers a new route like /plugins/telegram/webhook. Please refer to our official guide on Developing Kitsu Plugins for in-depth steps.
The manifesto will look like this:
id = "telegram"
name = "Telegram Bot"
description = "Telegram Bot"
version = "0.1.0"
maintainer = "Frank Rousseau <frank@cg-wire.com>"
website = "kitsu.cloud"
license = "AGPL-3.0-only"
maintainer_name = "Frank Rousseau"
maintainer_email = "frank@cg-wire.com"
frontend_project_enabled = true
frontend_studio_enabled = true
icon = "telegram"
And our custom route will parse incoming commands and map them to explicit backend actions:
from flask_restful import Resource
class WebhookResource(Resource):
def post(self):
args = self.get_args([
("message", {}, True),
("chat", {}, True),
])
message = args['message']
chat_id = args['chat'].get("id")
text = message.get("text", "")
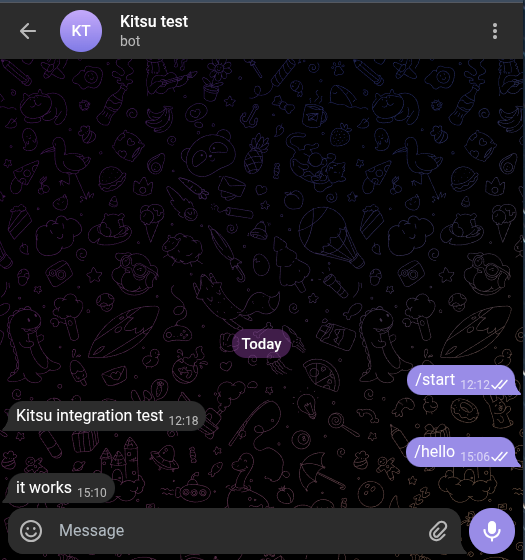
if text == "/hello":
send_telegram_message("it works")
return jsonify({"status": "ok"})
For the sake of simplicity we define a single command /hello, but you can create many more and use Kitsu services to query production data.
Deterministic commands are easier to test, log, and secure. You can go a step further and call a LLM to map a natural language request into a command.
We just need to register the route in the main entrypoint __init__.py:
from . import resources


routes = [(f"/telegram/webhook", resources.WebhookResource)]
After packaging and installing your plugin on your Kitsu server instance, it's time to tell your Telegram bot how to reach it.
If you use a local development environment, you can expose the server via tunnel. With ngrok for example, if your server runs on port 5000:
ngrok http 5000
You then need to configure your Telegram bot webhook to point to that URL:
curl -X POST "https://api.telegram.org/bot<YOUR_BOT_TOKEN>/setWebhook" \
     -H "Content-Type: application/json" \
     -d '{"url": "https://<random>.ngrok-free.app/plugin/telegram/webhook"}'
Now send /hello to your bot in your Telegram chat and see the result:
Conclusion
A custom messaging integration with Kitsu always follows a similar pattern: create a bot on a messaging platform, subscribe to Kitsu events, send structured notifications, and expose backend routes to handle incoming messages.
But that's not all: consider extending your Kitsu plugin with views!
For example, to display bot activity or recent interactions directly in the dashboard. Supervisors working inside Kitsu will be able to see which alerts were sent and which commands were triggered. The possibilities are limitless!