Animating a camera by hand in Blender can be tricky. Even if you picture a clean dolly shot and start laying down keyframes one by one, you can always somehow end up with jittery movements and a messy timeline. This kind of drift quickly eats time you could use doing something else.
That's where scripting comes in.
Blender's Python API gives you direct control over camera position, rotation, field of view, and path movement. And because it's code, you can quickly tweak and rerun it in seconds rather than scrubbing through keyframes hunting for the one that's slightly off.
This guide walks through the practical side of that: adding cameras, defining movement types, animating along splines, and tracking a moving subject. By the end of this read, you'll have a small toolkit you can pull into future projects.
Why Script Camera Movements?
If you're producing an architectural walkthrough, a product showcase, or a cutscene sequence with dozens of similar shots, manually keyframing each one is tedious. A script can generate a full orbit around an object, a rack focus sequence, or a sweeping crane move in seconds and reproduce it exactly on demand.
Human keyframing also introduces subtle inconsistencies: a pan that accelerates slightly differently on take two, or a zoom that overshoots by a few frames. Scripts enforce mathematical precision. Every shot obeys exactly the easing curve and speed you specify.
For studios and freelancers alike, time is money. Scripted cameras dramatically cut the back-and-forth of manual adjustments. A director who wants the camera 10% faster or 5 degrees higher doesn't require a full re-keyframe, just a variable change.
A script is a living document: wrapping your camera logic in parameterized functions means you can tweak timing, distance, or easing non-destructively without blowing up prior work.
Keep reading for all these reasons, and I guarantee you'll save hours of work in the future!
1. Add a Camera
Starting from the beginning, it's important to know how to create and manage cameras programmatically using Blender's bpy module:
import bpy

def add_camera(name="ScriptedCamera", location=(0, -10, 5)):
    bpy.ops.object.camera_add(location=location)
    camera = bpy.context.active_object
    camera.name = name
    return camera

def remove_camera(name):
    obj = bpy.data.objects.get(name)
    if obj and obj.type == 'CAMERA':
        bpy.data.objects.remove(obj, do_unlink=True)

def list_cameras():
    return [obj for obj in bpy.data.objects if obj.type == 'CAMERA']

cam = add_camera(name="MainCam", location=(0, -10, 2))
bpy.context.scene.camera = cam

print("Cameras in scene:", [c.name for c in list_cameras()])
add_camera() uses Blender's bpy.ops.object.camera_add() operator to insert a new camera into the 3D scene at a specified (X, Y, Z) location, defaulting to (0, -10, 5) in this example. After creation, we grab the newly added object via bpy.context.active_object, assign it a custom name, and return it so the caller can reference it later.
remove_camera() looks up an object by name in bpy.data.objects and checks that it's actually a camera before deleting it. The do_unlink=True argument makes sure the object is fully removed from the scene and any collections it belongs to, not just hidden.
list_cameras() iterates over every object in the current Blender scene and returns a filtered list containing only those whose type is 'CAMERA'. It's a simple utility for getting a snapshot of all cameras present at any given moment.
Setting bpy.context.scene.camera designates it as the one Blender renders from. You can have multiple cameras in a scene and switch between them at specific frames using markers, which is tremendously useful for multi-angle sequences.
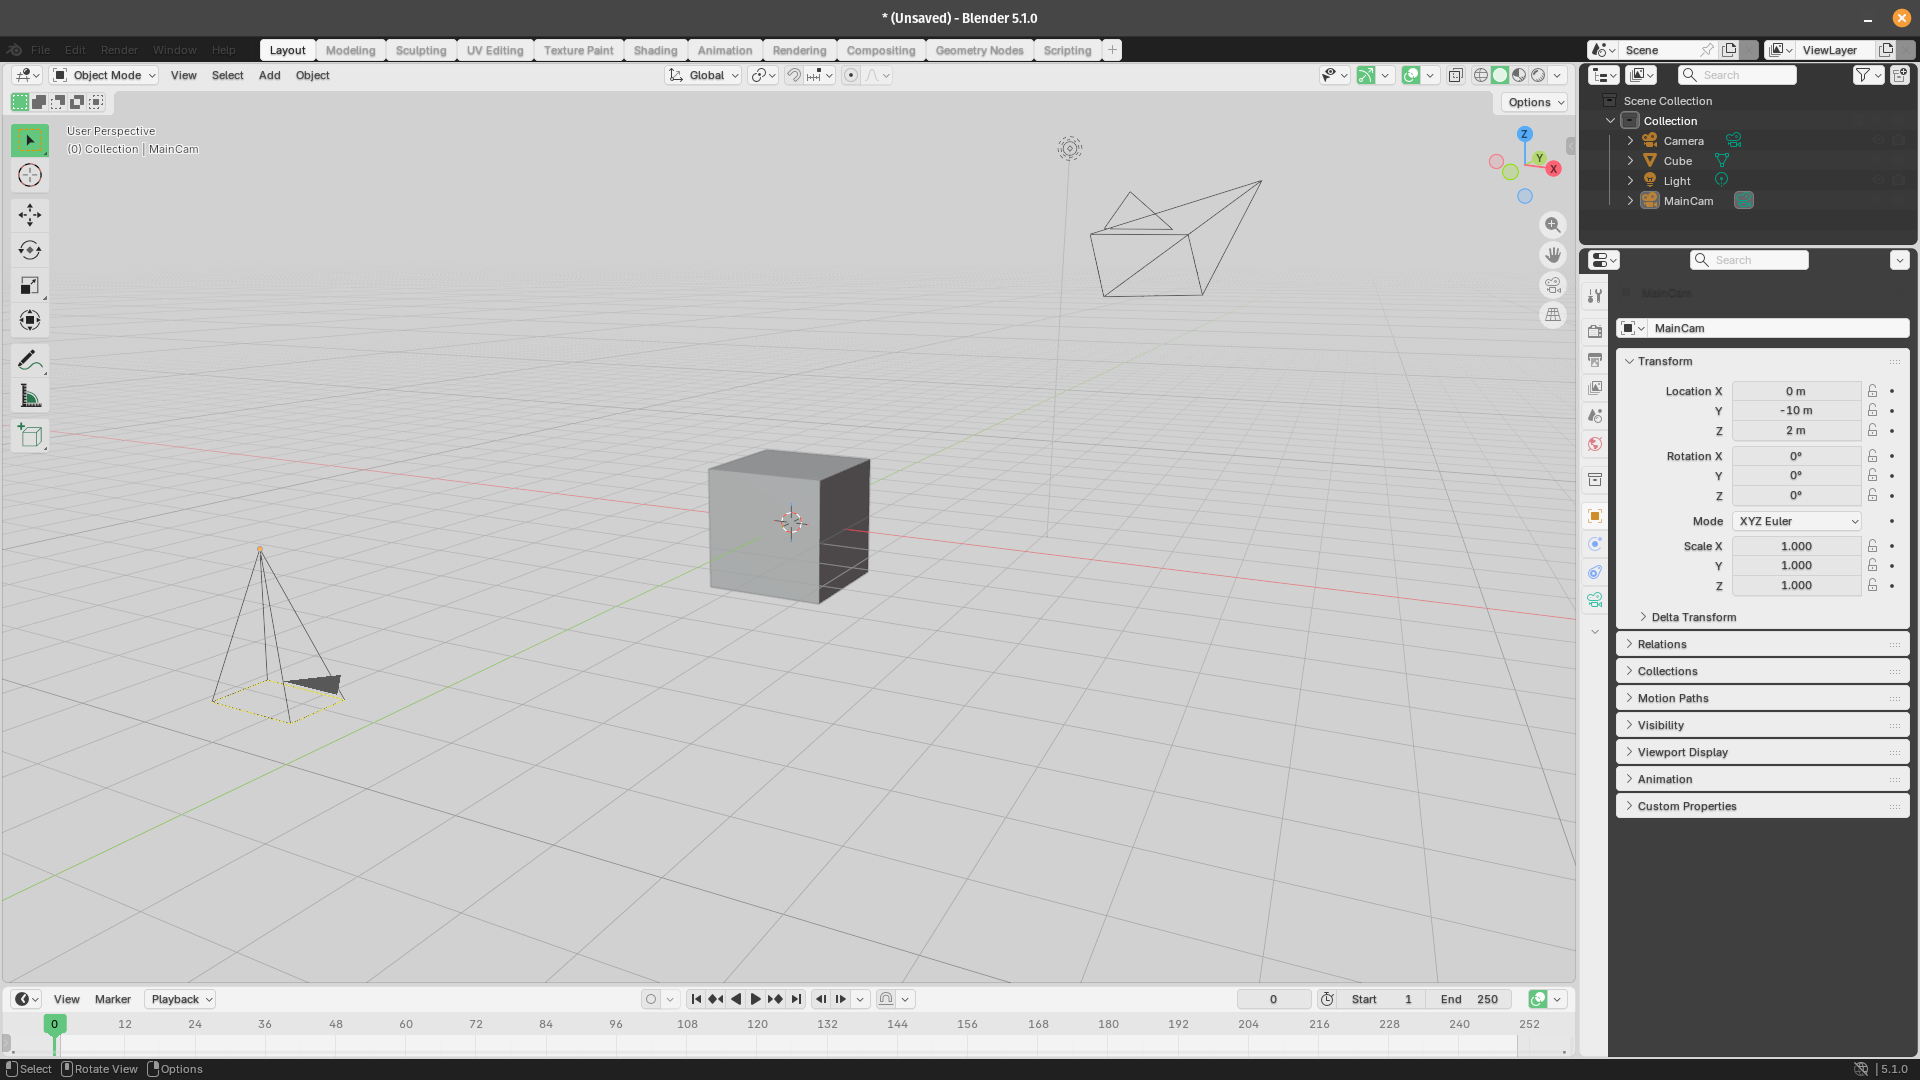
If you run the script in the Scripting tab, you can notice it'll add a second camera to the viewport:
2. Camera Movement Types
With a camera in the scene, the next step is making it move. Most cinematic camera movements map to simple transformations on the camera object:
import bpy
import math

def zoom(camera, start_fov=50, end_fov=20, start_frame=1, end_frame=60):
    cam_data = camera.data
    cam_data.lens = start_fov
    cam_data.keyframe_insert(data_path="lens", frame=start_frame)
    cam_data.lens = end_fov
    cam_data.keyframe_insert(data_path="lens", frame=end_frame)

def pan(camera, start_angle=0, end_angle=45, start_frame=1, end_frame=60):
    camera.rotation_euler.z = math.radians(start_angle)
    camera.keyframe_insert(data_path="rotation_euler", frame=start_frame)
    camera.rotation_euler.z = math.radians(end_angle)
    camera.keyframe_insert(data_path="rotation_euler", frame=end_frame)

def tilt(camera, start_angle=0, end_angle=20, start_frame=1, end_frame=60):
    camera.rotation_euler.x = math.radians(90 + start_angle)
    camera.keyframe_insert(data_path="rotation_euler", frame=start_frame)
    camera.rotation_euler.x = math.radians(90 + end_angle)
    camera.keyframe_insert(data_path="rotation_euler", frame=end_frame)

def truck(camera, start_x=0, end_x=5, start_frame=1, end_frame=60):
    camera.location.x = start_x
    camera.keyframe_insert(data_path="location", frame=start_frame)
    camera.location.x = end_x
    camera.keyframe_insert(data_path="location", frame=end_frame)

cam = bpy.context.scene.camera
zoom(cam, start_fov=50, end_fov=25, start_frame=1, end_frame=90)
pan(cam, start_angle=0, end_angle=30, start_frame=90, end_frame=150)
The zoom function animates a camera's focal length over a range of frames in Blender, simulating an optical zoom effect. It sets the camera's lens value to the starting field of view, inserts a keyframe at the start frame, then sets the lens to the ending field of view and inserts a second keyframe at the end frame.
pan rotates the camera horizontally around its Z-axis between two angles. It converts both angles from degrees to radians as Blender requires, sets the Z rotation at the start frame, then sets it to the end angle at the end frame, producing a side-to-side sweeping motion.
tilt works the same way as pan but acts on the X-axis instead, to produce a vertical up-or-down camera movement. The angles are offset by 90 degrees before conversion because Blender's default camera orientation points downward along X, so 90° represents "looking straight ahead" and any tilt is applied relative to that baseline.
The truck function moves the camera physically left or right along the X-axis, as opposed to rotating it. It keyframes the camera's X position at the start and end frames, causing it to slide laterally across the scene.
There are many more types of camera movements we could cover, but you get the idea.
As an example, we retrieve the active scene camera from Blender's current context, then chains two camera moves together sequentially. First, the script zooms the lens in from 50mm to 25mm over frames 1–90.
Then, once the zoom completes, we pan the camera 30 degrees to the right over frames 90–150. The two animations share frame 90 as a transition point, so one motion hands off cleanly to the next.
Each function inserts keyframes on the relevant data path and Blender interpolates between them automatically. To make your animations look way more cinematic, you can set the interpolation mode on the resulting F-Curves to BEZIER or EASE_IN_OUT after keyframing via the Graph Editor, or programmatically through fcurve.keyframe_points[i].interpolation.
3. Defining Spline Paths
Straight-line movement rarely looks cinematic either. For smooth, curved camera motion like for a crane arc or a fly-through, you might want the camera to follow a Bézier or NURBS spline path. Again, scripting helps a lot to calculate paths:
import bpy

def create_camera_path(points, camera):
    curve_data = bpy.data.curves.new(name="CameraPath", type='CURVE')
    curve_data.dimensions = '3D'
    curve_data.use_path = True
    curve_data.path_duration = bpy.context.scene.frame_end

    spline = curve_data.splines.new('BEZIER')
    spline.bezier_points.add(len(points) - 1)

    for i, pt in enumerate(points):
        bp = spline.bezier_points[i]
        bp.co = pt
        bp.handle_left_type = 'AUTO'
        bp.handle_right_type = 'AUTO'

    path_obj = bpy.data.objects.new("CameraPath", curve_data)
    bpy.context.scene.collection.objects.link(path_obj)

    constraint = camera.constraints.new(type='FOLLOW_PATH')
    constraint.target = path_obj
    constraint.use_curve_follow = True

    constraint.offset = 0
    constraint.keyframe_insert(data_path="offset", frame=1)
    constraint.offset = -100
    constraint.keyframe_insert(data_path="offset",
                               frame=bpy.context.scene.frame_end)

    return path_obj

path_points = [
    (0, -8, 3),
    (-5, -5, 4),
    (-7, 0, 3),
    (-4, 5, 2),
    (0, 7, 2),
]

cam = bpy.context.scene.camera
create_camera_path(path_points, cam)
In this code snippet, we define five 3D coordinates that sketch out a curved arc moving from behind and to the right, sweeping left and forward, then settling slightly ahead and above the origin. It grabs the scene's active camera and passes both the point list and camera into create_camera_path, triggering the full setup so the camera will smoothly fly along that arc over the course of the scene. create_camera_path builds a smooth 3D camera animation path in Blender.
The script starts by creating a new curve object named "CameraPath" configured as a 3D Bezier spline, with its total duration matched to the scene's end frame.
We then populate the spline with the provided points, setting each control point's handles to AUTO so Blender calculates smooth curves between them automatically. The resulting curve is wrapped in a Blender object and linked into the active scene's collection so it becomes visible.
Next, we attach a FOLLOW_PATH constraint to the camera, pointing it at the new curve, which forces the camera to travel along it.
Lastly, the script animates the constraint's offset property by inserting two keyframes. One at frame 1 with an offset of 0 (start of path):
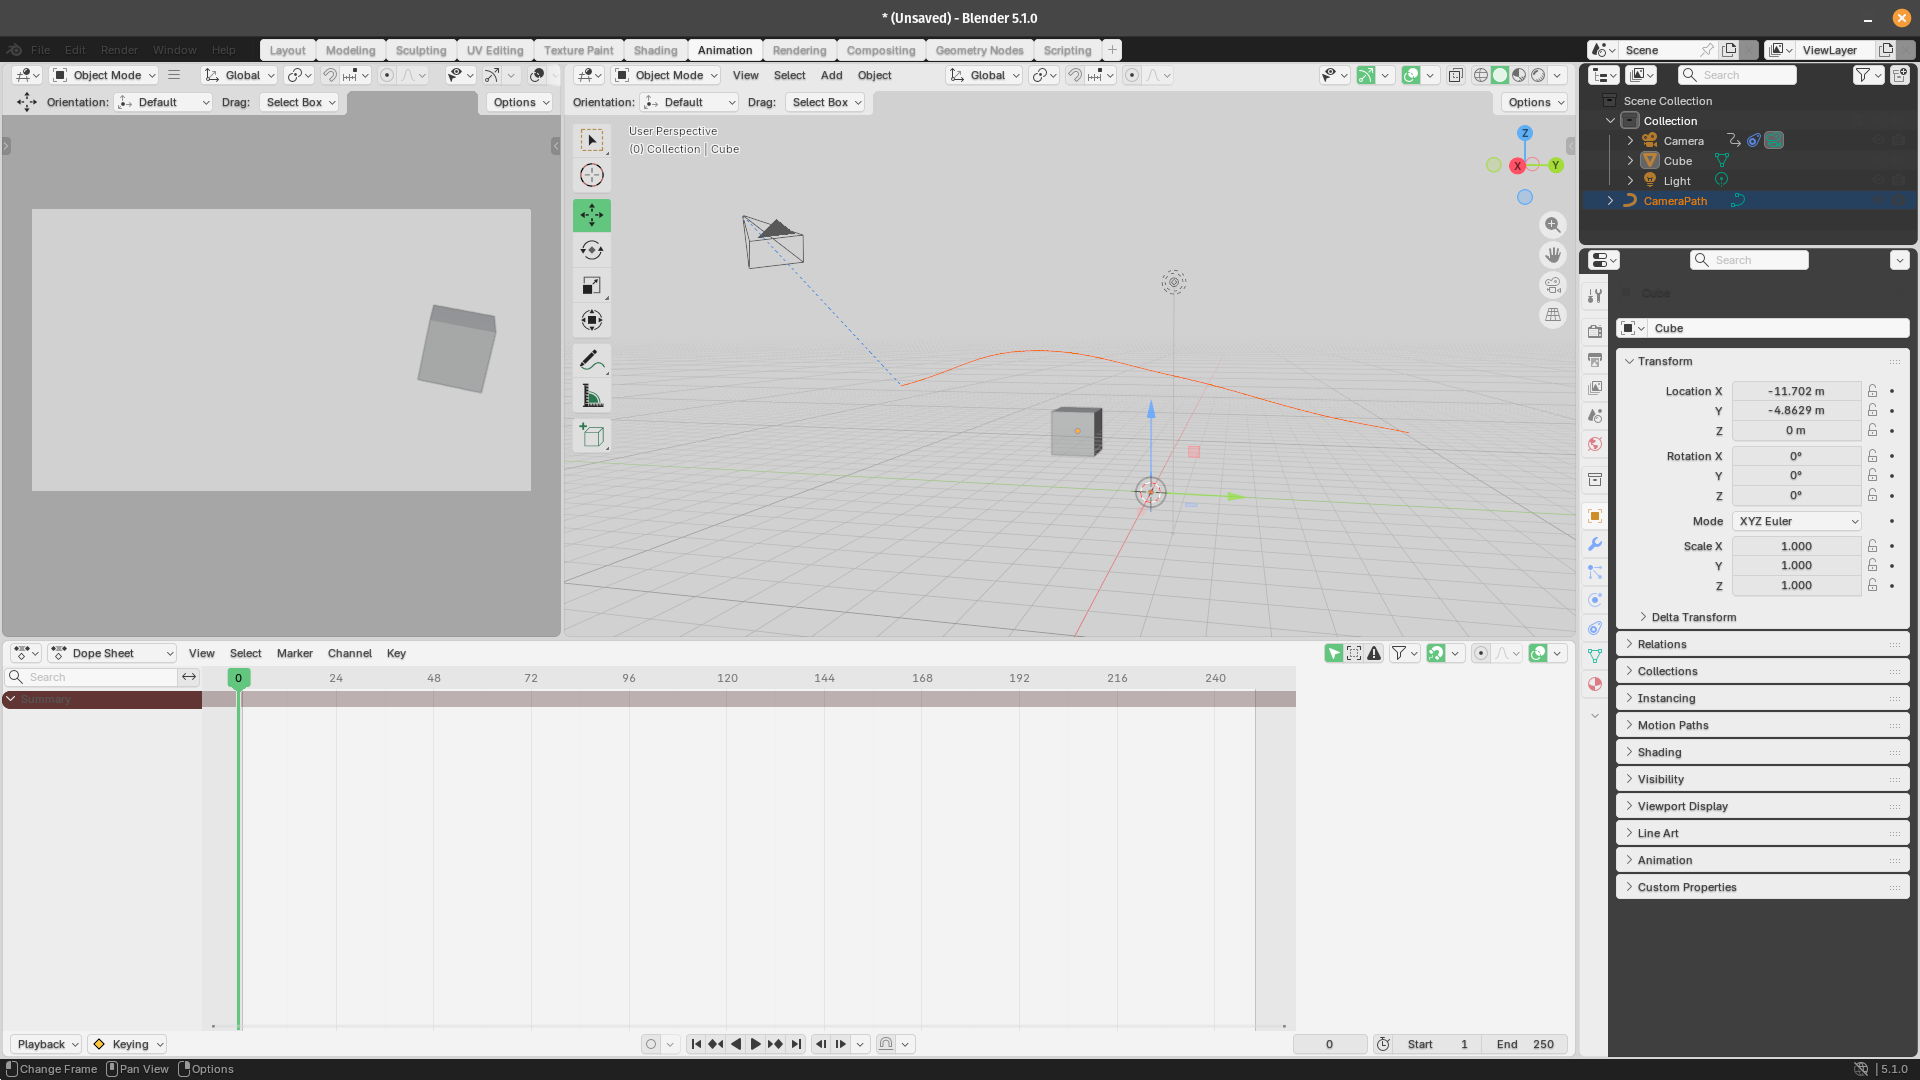
And one at the scene's last frame with an offset of -100 (end of path):
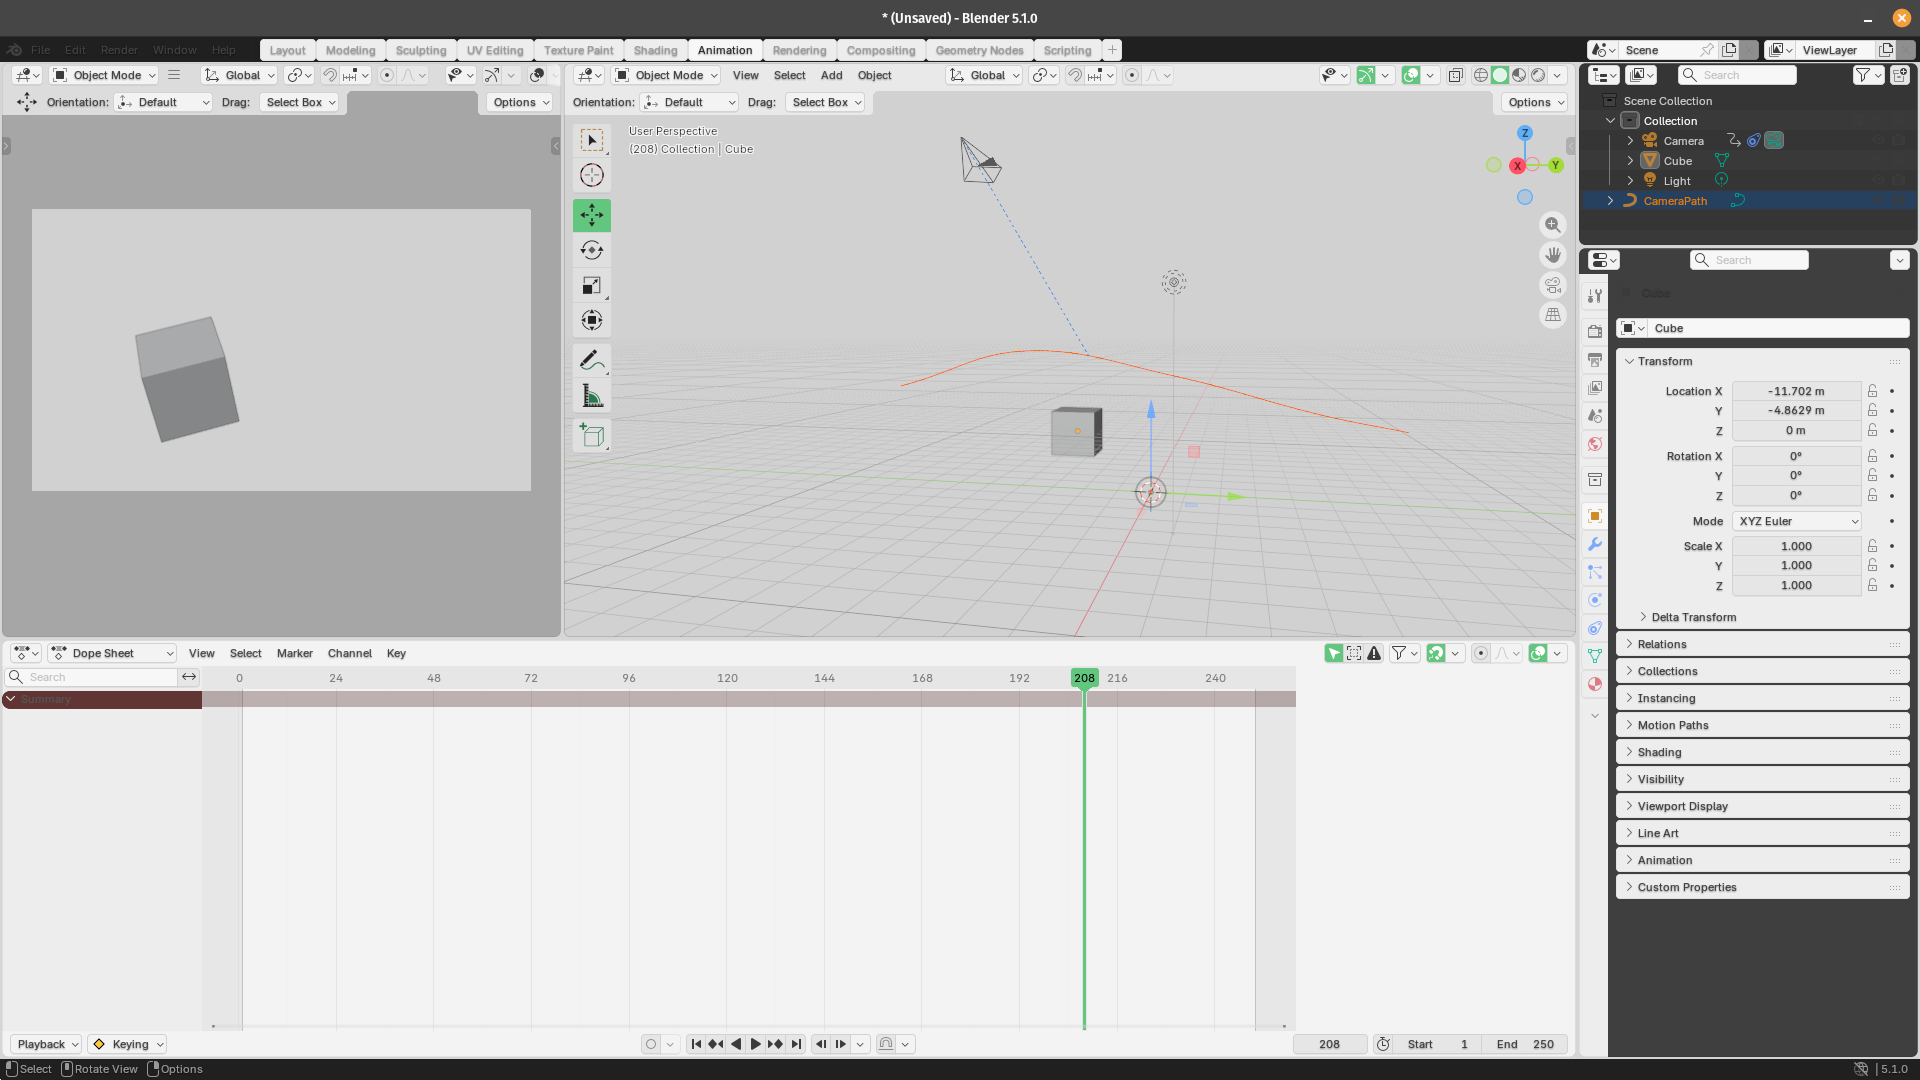
The FOLLOW_PATH constraint handles all the positional math. Setting use_curve_follow to True also aligns the camera's forward axis with the curve's tangent, so it naturally faces the direction of travel.
You can also change the handle types from AUTO to VECTOR for sharp corners, or FREE for full manual control over the Bézier handles.
4. Following a Subject
A camera that tracks a moving character or object is also essential for action shots and dialogues. Blender's TRACK_TO constraint makes this trivial to set up in code:
import bpy
def track_camera_to_subject(camera, subject_name, track_axis='TRACK_NEGATIVE_Z', up_axis='UP_Y'):
subject = bpy.data.objects.get(subject_name)
if subject is None:
print(f"Subject '{subject_name}' not found.")
return
constraint = camera.constraints.new(type='TRACK_TO')
constraint.target = subject
constraint.track_axis = track_axis
constraint.up_axis = up_axis
return constraint
def add_damped_track(camera, subject_name):
subject = bpy.data.objects.get(subject_name)
if subject is None:
return
constraint = camera.constraints.new(type='DAMPED_TRACK')
constraint.target = subject
constraint.track_axis = 'TRACK_NEGATIVE_Z'
return constraint
cam = bpy.context.scene.camera
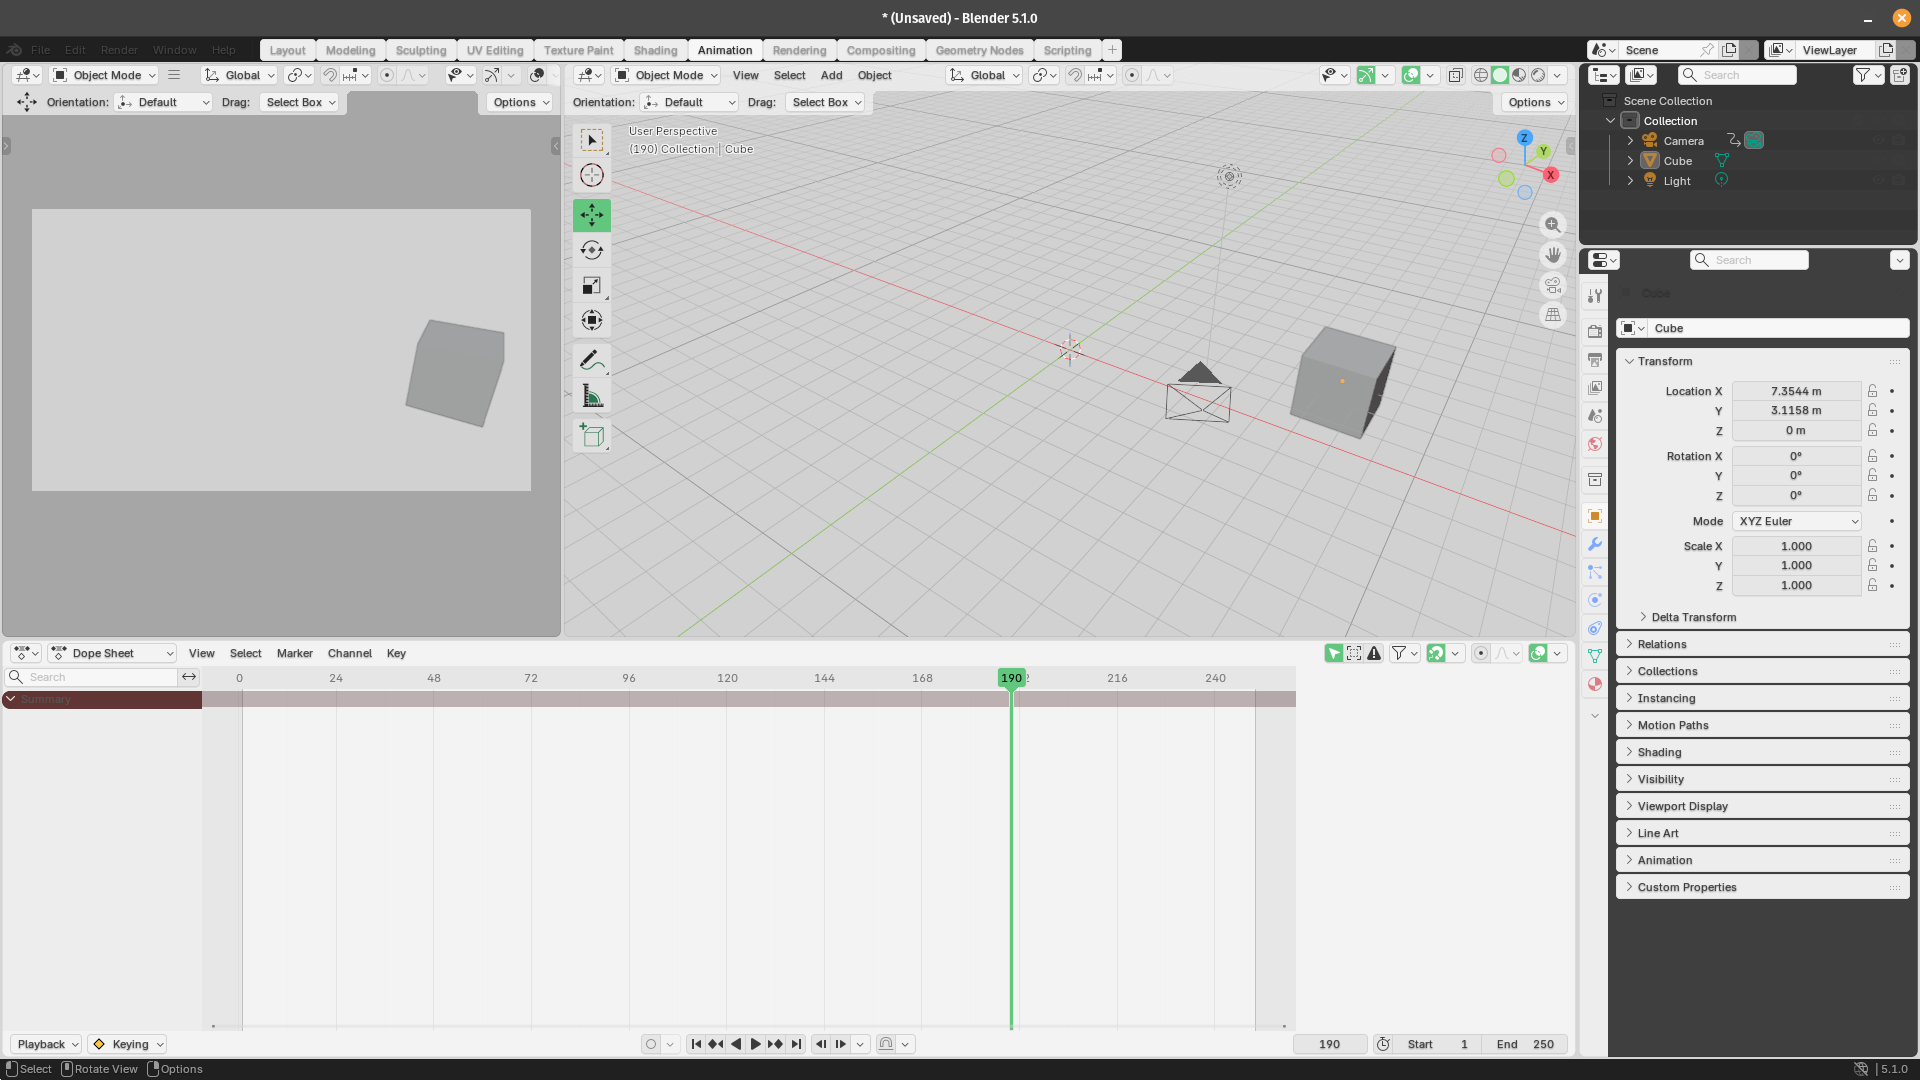
track_camera_to_subject(cam, "Cube")
track_camera_to_subject looks up a Blender object by name and adds a "Track To" constraint to the given camera, making it rigidly point at that subject. It accepts optional parameters for which axis the camera points along and which axis stays upright, defaulting to negative Z for tracking and Y for up. If the named subject doesn't exist in the scene, it prints a warning and exits early; otherwise it configures and returns the new constraint.
add_damped_track does something similar but uses a "Damped Track" constraint instead, which produces a softer, more natural rotation rather than a strict axis-locked aim. It always uses the negative Z axis for tracking and returns the constraint on success.
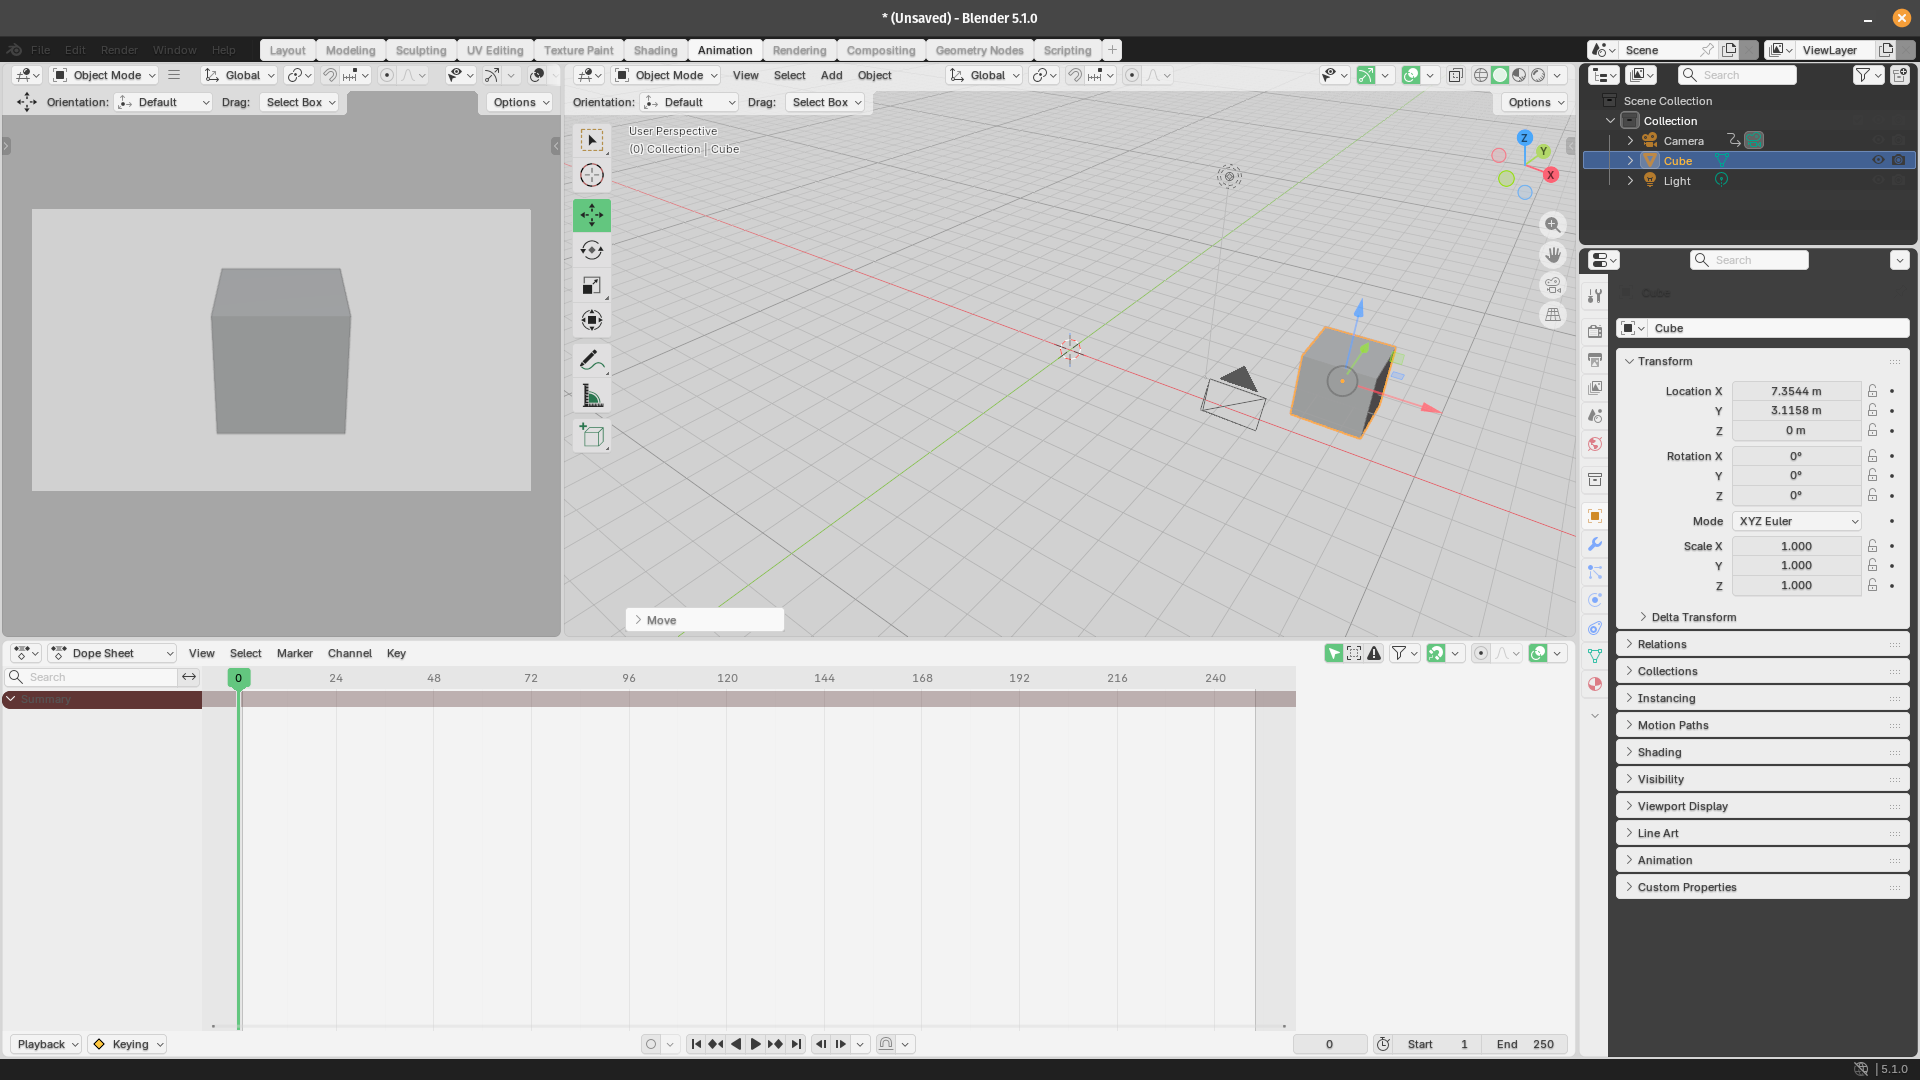
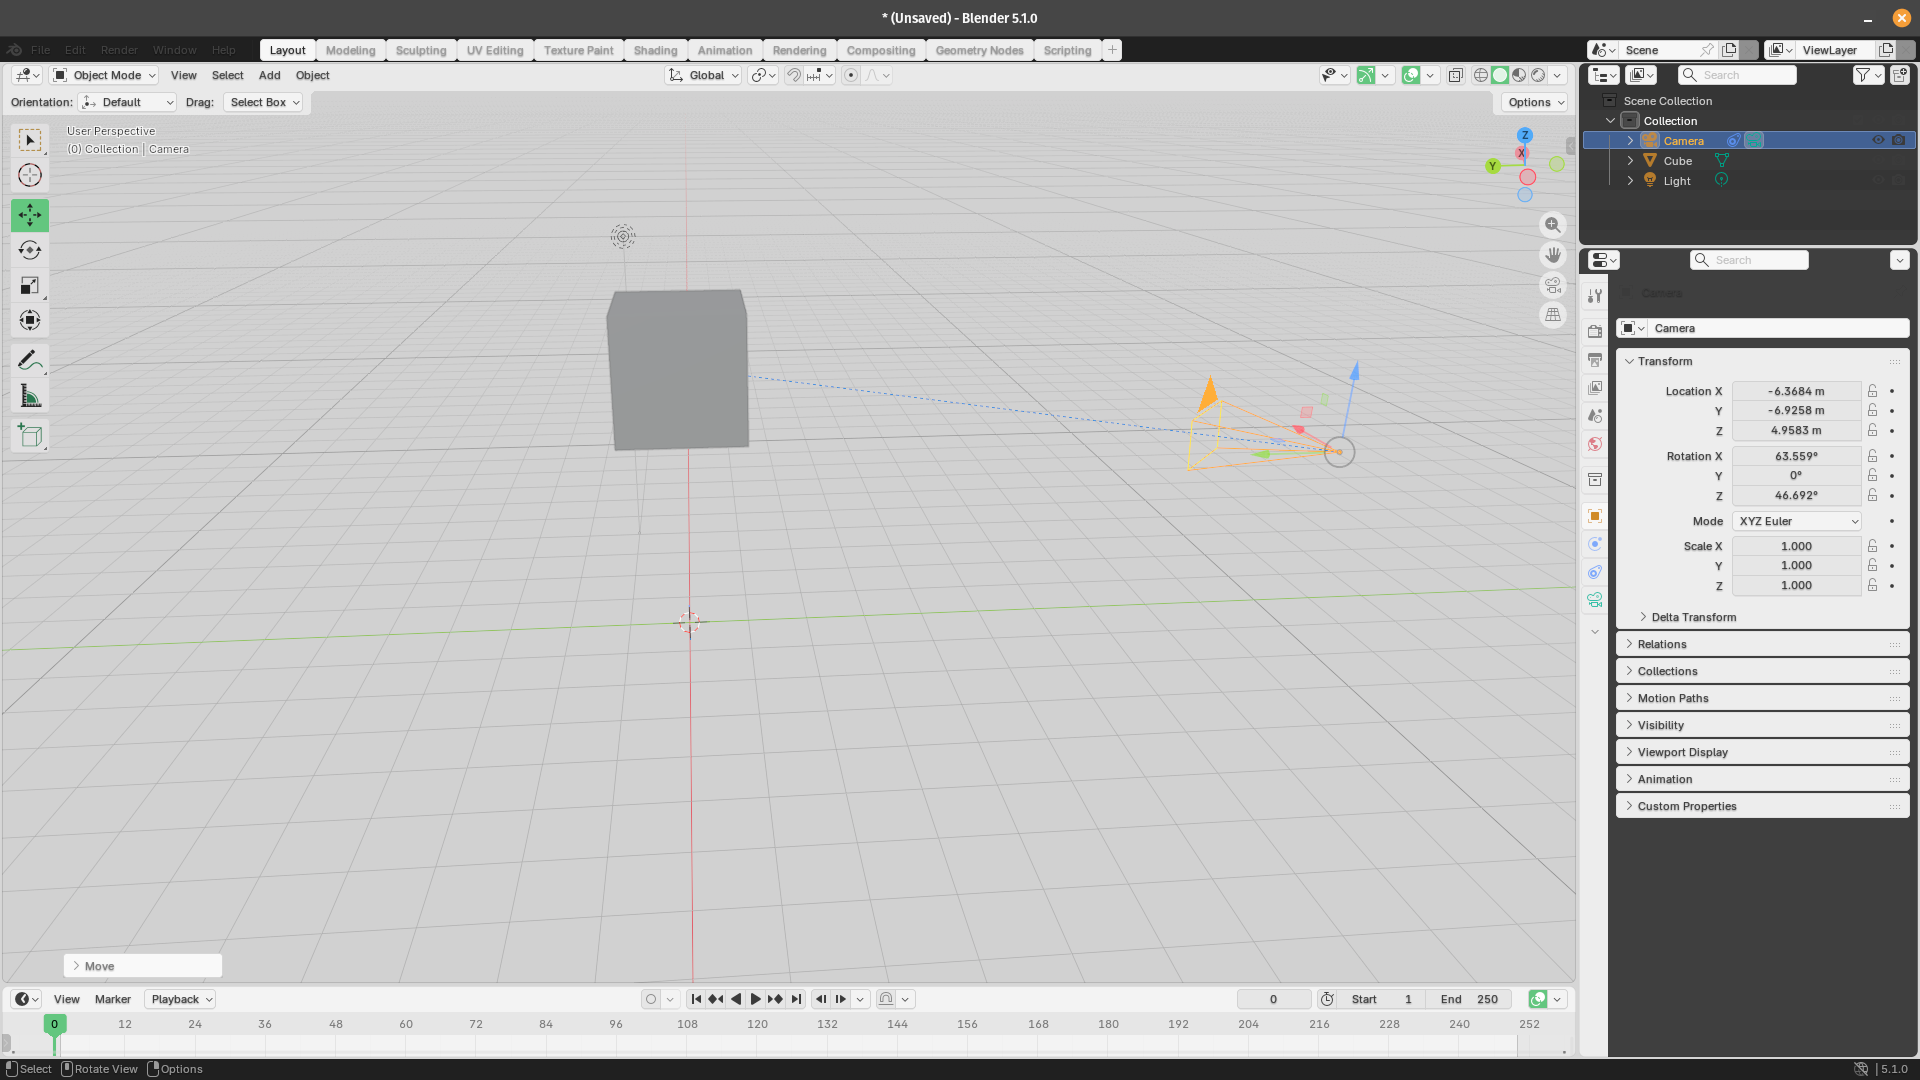
The program grabs whichever camera is currently active in the open Blender scene, then calls track_camera_to_subject to make it point at the default Cube object using the default axes.
As you can see, when we move the camera, the view is still centered on the cube object. Before:
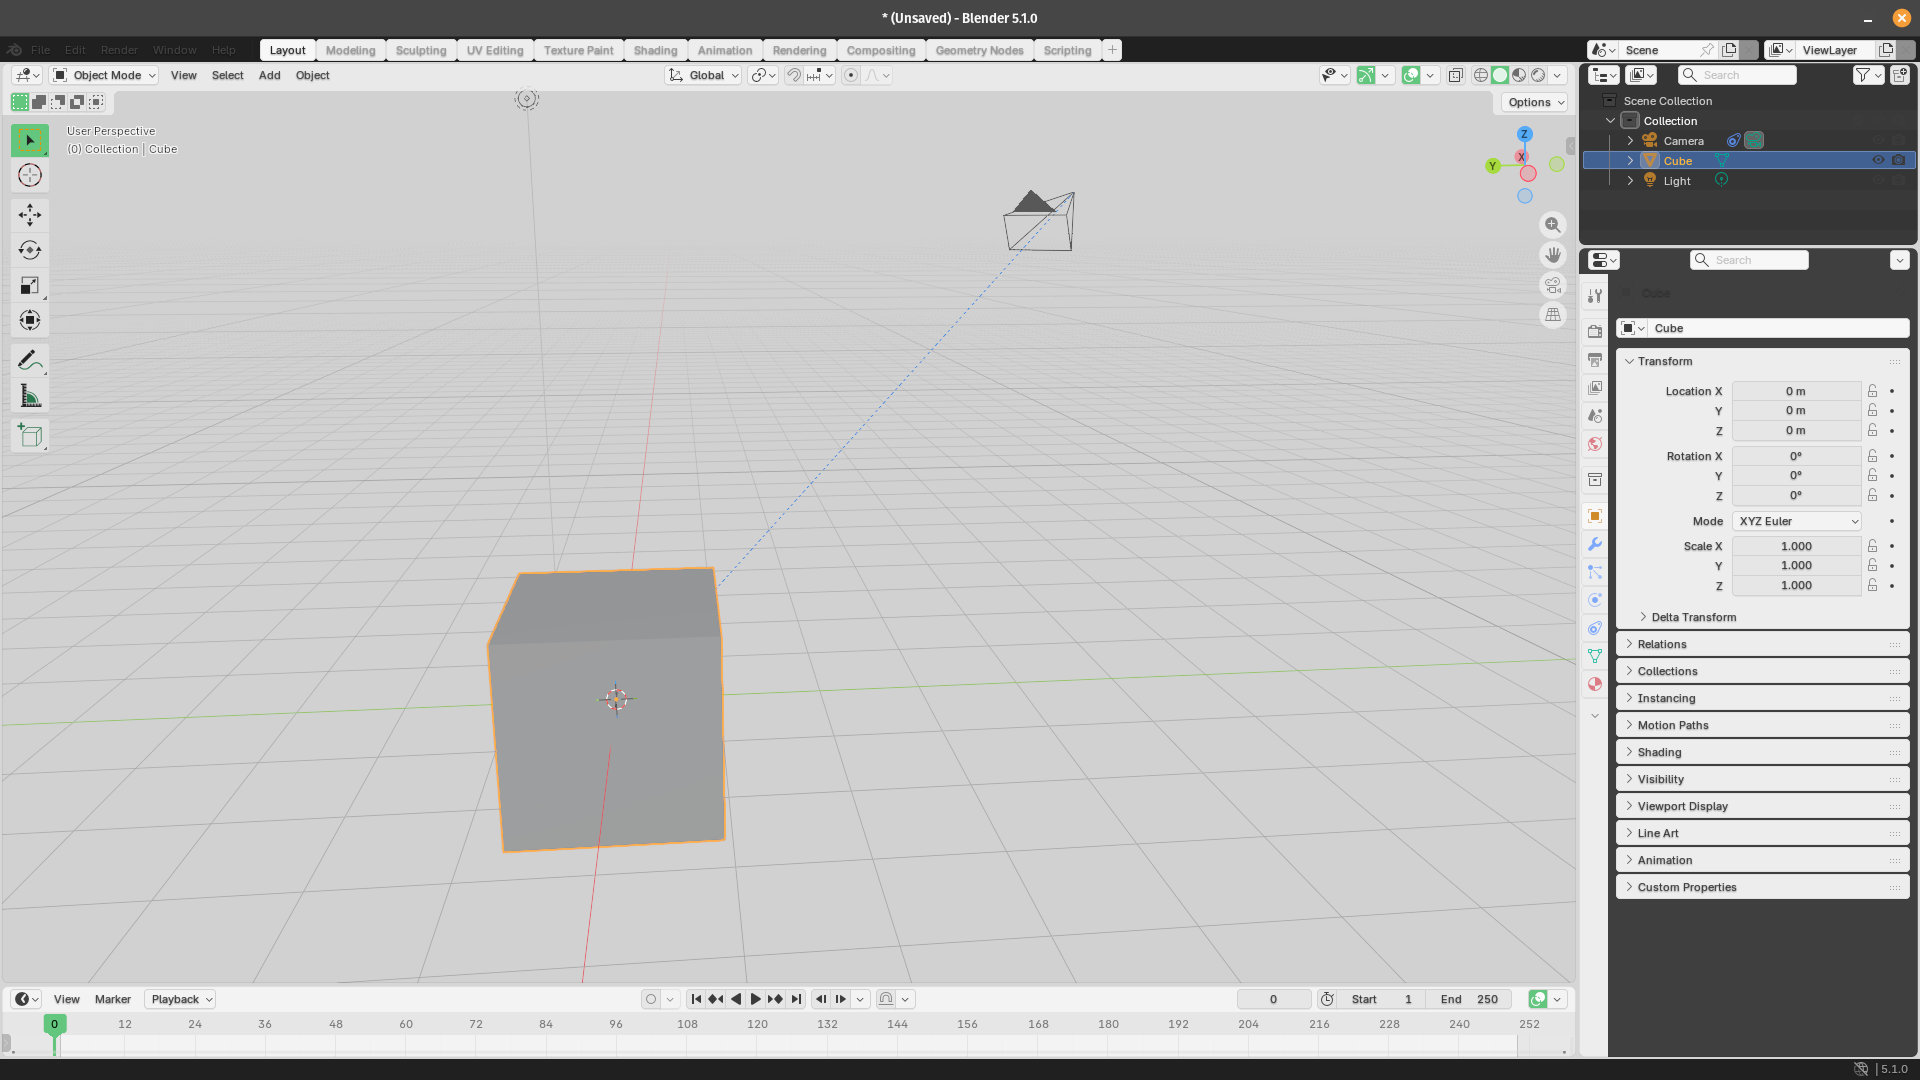
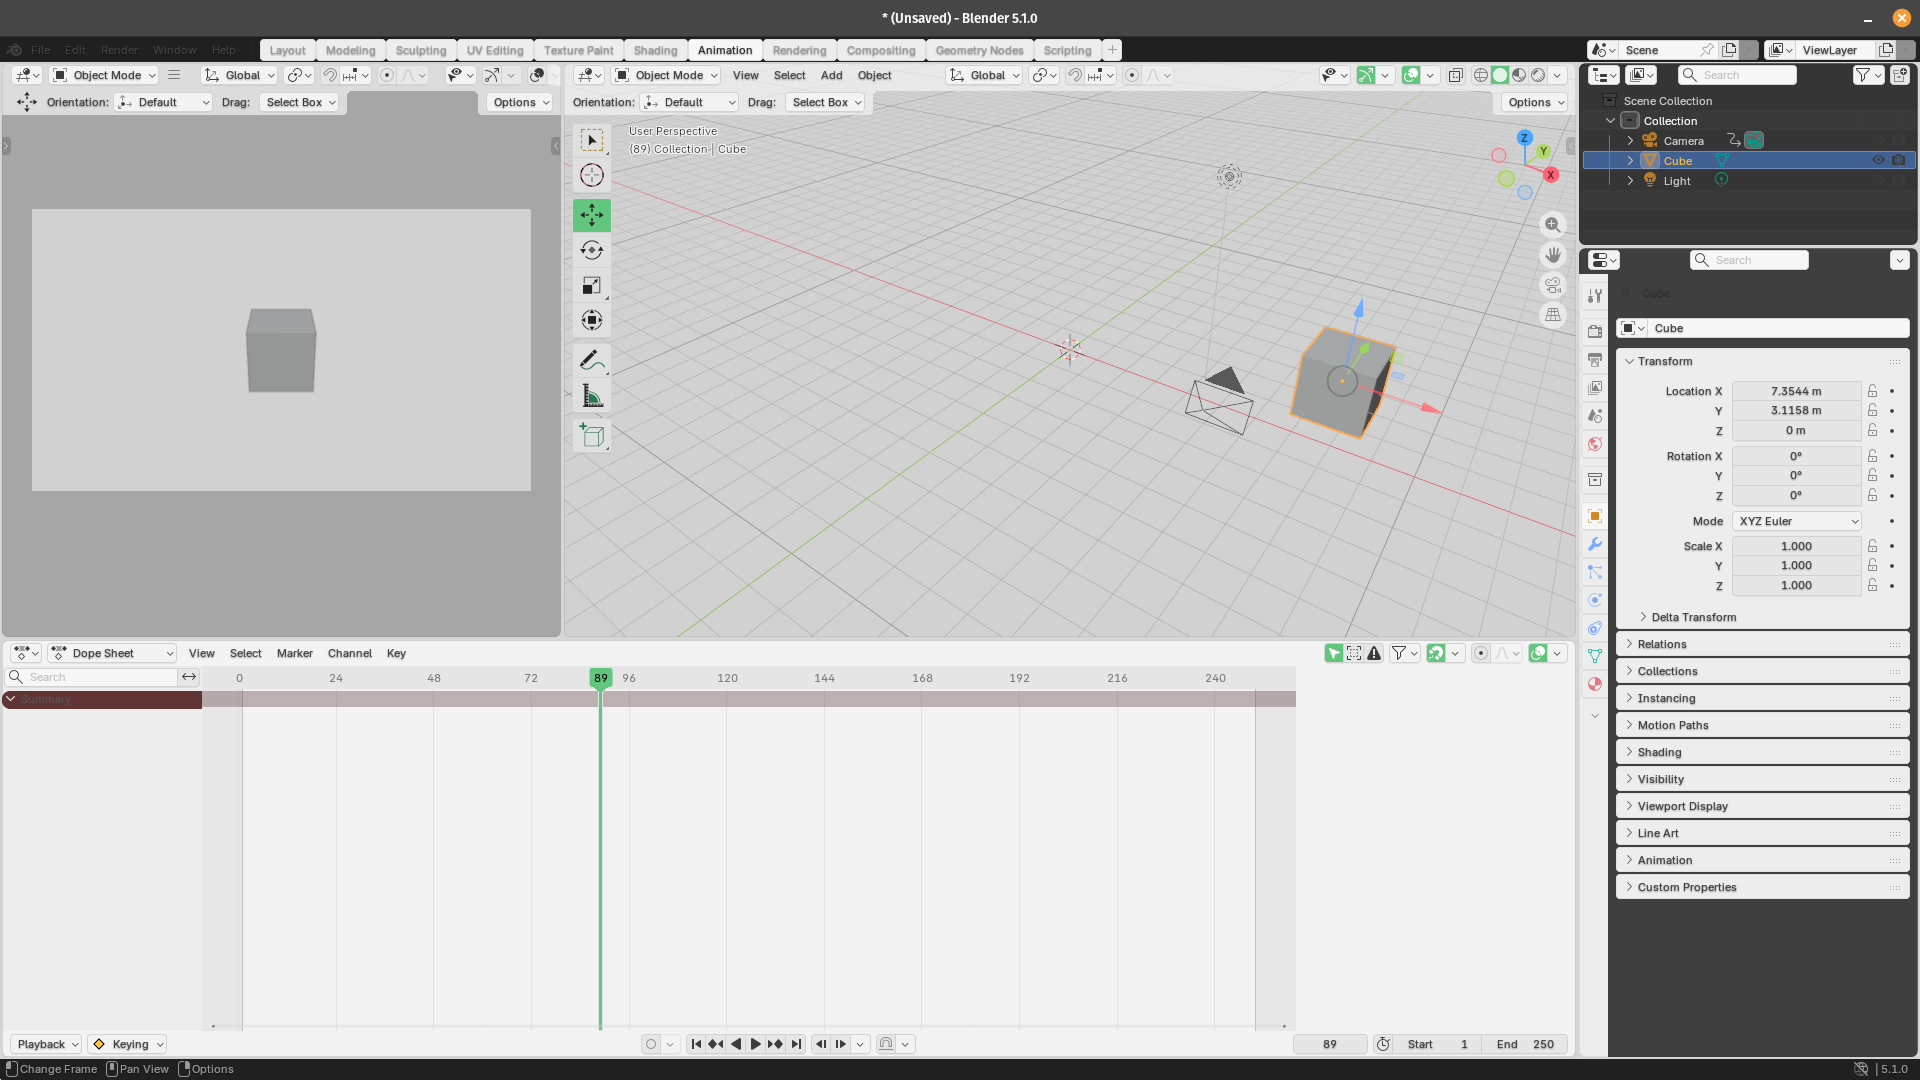
And after moving the camera and/or the cube:
TRACK_TO provides a rigid lock: wherever the subject moves, the camera immediately pivots to face it. For a more organic, slightly delayed feel (common in shoulder-cam and handheld simulations), use DAMPED_TRACK instead.
You can also stack constraints of course. For example, following a spline path and tracking a subject simultaneously to create complex shots like a camera orbiting a character while keeping them framed at all times.
Conclusion
Blender's Python API turns camera animation from an error-prone manual process into a precise system. You've seen how to programmatically add and manage cameras, keyframe fundamental movements like zooms, pans, tilts, and trucks, guide cameras along smooth spline paths, and lock onto moving subjects with tracking constraints.
The real creative power is when you combine these techniques with object animation: pair a camera on a Follow Path constraint with a subject that has its own animated movement, and you can script a parallax shot where the foreground and background shift at different rates to create depth. Offset a zoom with a dolly move in the opposite direction, and you get a Hitchcock dolly zoom effect, entirely from code. Layer a Track To constraint over an orbital path, and complex action-following crane shots animate themselves.