It's easy to panic the first time you hear the word shader. Someone mentions GLSL, GPUs start sweating, and suddenly you're imagining walls of unreadable code and your computer fan screaming for mercy.
oHere's the part no one tells you early enough: you don't need to be a mathematician or a graphics programmer to work with shaders. You're not required to write low-level GPU code or understand every equation behind light physics. Blender doesn't expect that from you. Instead, it gives you nodes: visual building blocks that behave more like Lego than code. You plug things together, see the result instantly, and adjust until it feels right.
Think of shaders less as code and more as recipes. You're mixing values, textures, and logic to describe how a surface should react to light. Sometimes you'll follow a known recipe, sometimes you'll improvise, and sometimes you'll break things just to see what happens. It's how you'll learn.
In this article, we're going to demystify what shading actually is, strip away the fear around it, and explore how to manipulate shaders procedurally using Blender's node system or a bit of scripting for an animation pipeline. By the end, shading won't feel like a forbidden room anymore.
What's a Shader?
To understand shaders, we have to stop thinking about "colors" and start thinking about "physics."
If you paint a wooden chair red in the real world, you aren't just changing its color. You are adding a layer of material that interacts with light. That red paint has a specific roughness (how much it scatters light), a specific specularity (how shiny it is), and a specific refractive index.
A shader is a set of instructions that tells the computer how to simulate that light interaction.
When a ray of light from your digital sun hits the surface of your object, the shader steps in and asks:
- "Are you bouncing off?" (Reflection)
- "Are you going through?" (Transmission/Glass)
- "Are you getting trapped inside?" (Absorption)
- "Are you scattering under the skin?" (Subsurface Scattering)
If you're modeling a wet cobblestone street, a simple image texture makes it look like a flat photo of a street. A shader tells the renderer that the water in the cracks is perfectly reflective and smooth, while the stone is rough and dull. It tells the light to bounce differently off the wet parts than the dry parts. Light shapes reality.
Why You Must Master Shader Nodes
You might ask, "Why not just download textures?"
Photo-scanning is great, but procedural shading gives you three superpowers that static images cannot match.
When you use an image texture (a JPG or PNG), you are limited by pixels. Zoom in too close to a wall, and it becomes blurry.
Shaders use math. Math has no resolution limit. You can zoom into a procedural scratch on metal until you see the microscopic grooves, and it will remain crisp. Even if you have a model you're proud of, with clean topology and nice proportions, it'll still look flat without shaders.
Blender's shader nodes make it easy to tweak your textures in a consistent way. Let's say you are texturing a spaceship: you paint rust onto the hull using a texture map. Your Art Director walks in and says, "Great, but the ship looks too old. Reduce the rust by 50%." If you hand-painted that, you have to start over or spend hours erasing. With shader nodes, you simply locate the "Rust Amount" value you created and slide it from 1.0 to 0.5. Done.
Static textures look frozen, but shaders can also be animated. You can build a shader setup where moss grows on a rock over time based on the frame number, or where a shield glows brighter as it gets hit. Shaders allow your materials to react to the environment.
For all these reasons, learning to master shader nodes is an incredible unlock for professional artists working with tight deadlines.
The Different Types of Shader Nodes
Blender's node system works like a flow chart. You click Add to add nodes and connect them together. Data flows from left to right. To understand how to leverage each feature, you need to understand the different node types available.
1. Input Nodes
Input nodes provide data from the scene, object, geometry, or user-defined values into the shader network.
- Texture Coordinate - Provides UV, object, generated, and camera coordinates + use UV output to correctly map an image texture onto a UV-unwrapped model
- Geometry - Outputs geometric information such as normals and pointiness + use Pointiness to create dirt accumulation in crevices
- Fresnel - Calculates view-angle-based reflectivity + use it to create stronger reflections on the edges of glass
- Object Info - Supplies per-object data like random values or object color + use Random output to give each object a slightly different color
- Value - Outputs a constant numerical value + use it to control roughness with a single slider
- Color - Outputs a constant color value + use it as a base color for a stylized material
2. Output Nodes
Output nodes define the final result of a shader and connect the node network to Blender’s rendering system.
- Material Output - Outputs the final surface, volume, and displacement data + connect a Principled BSDF to the Surface input
3. Shader Nodes
Shader nodes define how light interacts with a surface, including reflection, refraction, and emission.
- Principled BSDF - Physically based all-in-one surface shader + create realistic metal, plastic, or skin materials
- Diffuse BSDF - Produces matte, non-reflective surfaces + use for chalk, clay, or unpolished stone
- Glossy BSDF - Produces mirror-like reflections + use for polished metal or mirrors
- Glass BSDF - Combines refraction and reflection + use for windows or glass bottles
- Emission - Emits light from a surface + use for screens, LEDs, or neon signs
- Mix Shader - Blends two shader outputs + mix diffuse and glossy shaders for worn metal
4. Displacement Nodes
Displacement nodes alter surface detail by modifying geometry or shading normals.
- Displacement - Performs true geometric displacement + create real depth in a brick wall using a height map (Cycles)
- Bump - Simulates surface detail using normal perturbation + add fine scratches without increasing geometry
- Normal Map - Converts normal textures into usable normal data + apply a baked normal map from a game asset
5. Color Nodes
Color nodes adjust, blend, and transform color information within the shader network.
- Mix Color - Blends two colors or textures + mix a dirt texture over a clean base color
- RGB Curves - Adjusts contrast and color balance + increase texture contrast without re-editing the image
- Hue/Saturation - Modifies hue, saturation, and value + tint a material blue without repainting textures
- Invert - Reverses color values + invert a roughness map to create a glossiness map
6. Texture Nodes
Texture nodes generate or load image and procedural textures for materials.
- Image Texture - Loads external image files + use an albedo map for a PBR material
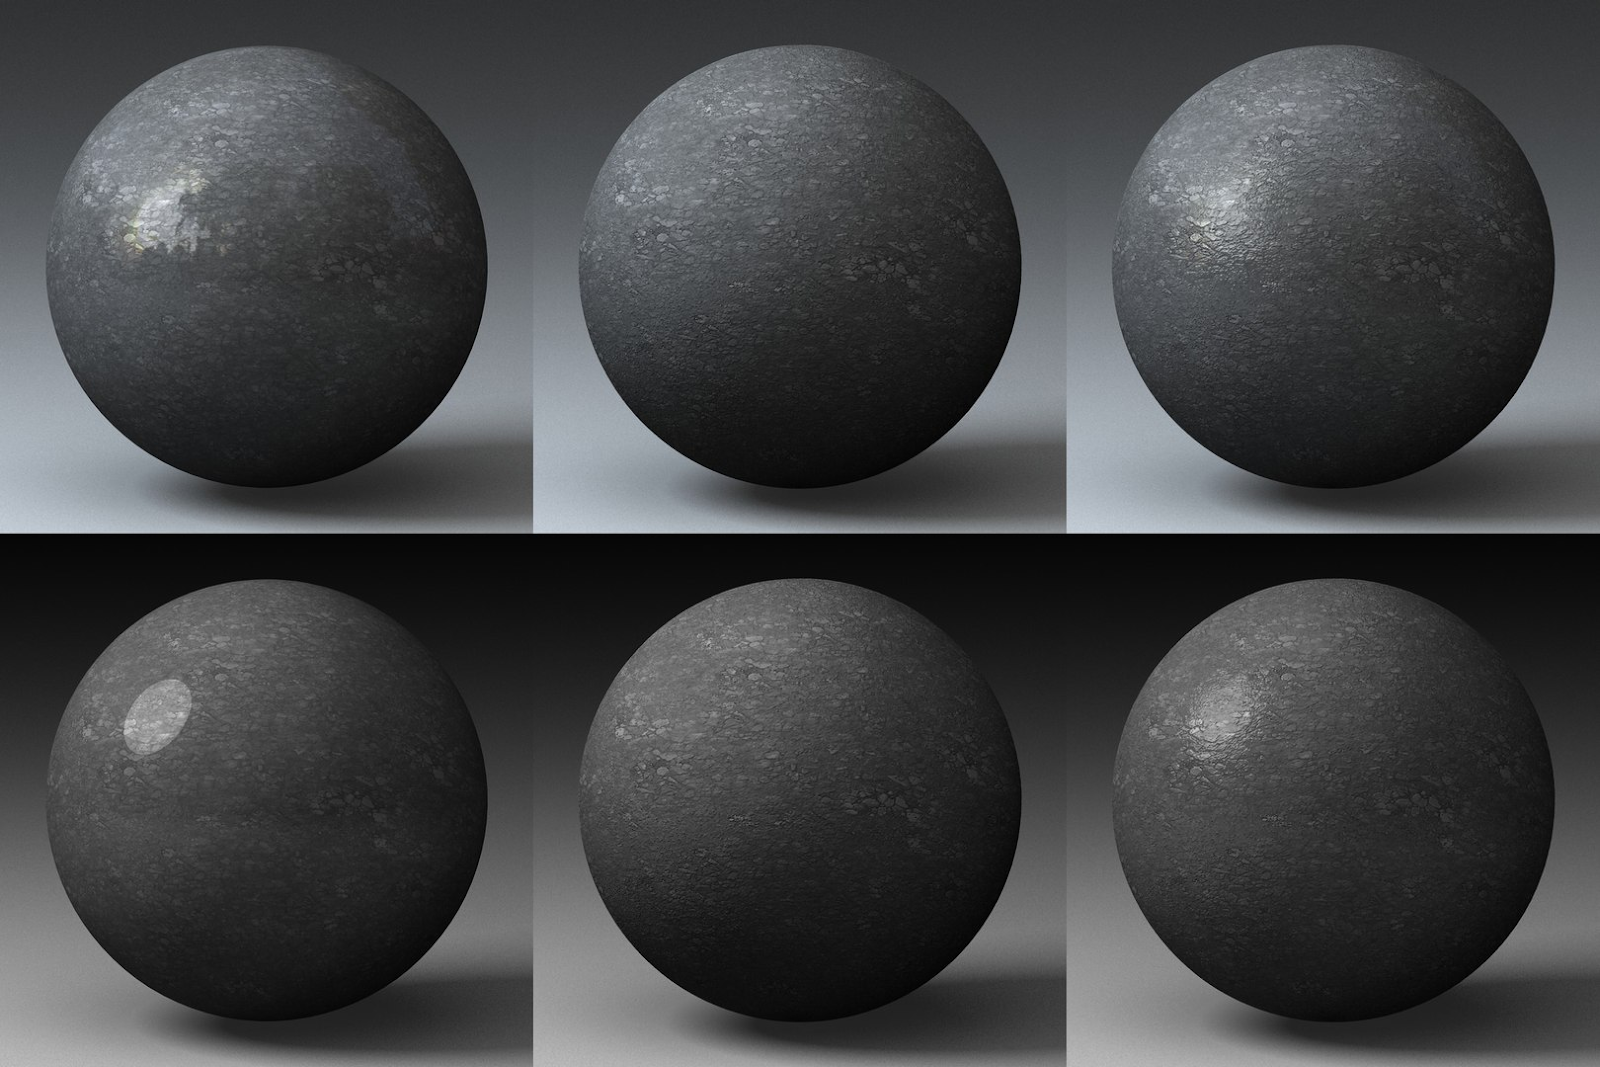
- Noise Texture - Generates smooth procedural noise + add subtle roughness variation to plastic
- Voronoi Texture - Produces cell-based patterns + create cracks, scales, or stone tiles
- Gradient Texture - Outputs smooth gradients + use as a mask for blending materials
7. Utility Nodes
Utility nodes perform mathematical operations and data conversions.
- Mapping - Transforms texture coordinates + scale and rotate a texture pattern
- Math - Performs numerical operations + clamp roughness values to prevent extremes
- Vector Math - Performs vector-based calculations + modify normal or direction vectors
- Clamp - Limits values to a specified range + prevent over-bright emission values
8. Group Nodes
Group nodes package multiple nodes into reusable, organized components.
- Node Group - Encapsulates complex node setups + create a reusable “Rust Shader” used across multiple assets
9. Layout Nodes
Layout nodes organize the node graph visually and do not affect rendering output.
- Frame - Visually groups related nodes + frame all texture-related nodes together
- Reroute - Redirects node connections for clarity + clean up overlapping noodle connections
The Next Level: Scripting Your Shaders
When you get comfortable connecting nodes manually, you can make wood, plastic, gold, or any kind of material. But what if you have a scene with 500 unique objects, and you need to generate a random variation of a worn metal material for each one with some tweaks?
This is where Python scripting becomes key. You can use it to ensure every material in your project follows the same node structure. You can write a script that says, "Make this material red, but vary the hue slightly by a random number for every object."
Let's get our hands dirty. We are going to write a Python script that creates a new material, adds a Principled BSDF, generates a noise texture to control the color, and links it all up.
You can find the complete source code for the example integration showcased in this guide on our GitHub:
🔗 https://github.com/cgwire/blog-tutorials/tree/main/blender-shaders
Open the Scripting tab in Blender, create a new text block, and follow along.
First, we need to import the library and tell Blender we want to create a new material.
import random

import bpy

def create_procedural_material(mat_name):
    mat = bpy.data.materials.new(name=mat_name)

    mat.use_nodes = True
    nodes = mat.node_tree.nodes
    links = mat.node_tree.links

    nodes.clear()
Now, let's add the nodes. Think of this as pulling items out of the "Add" menu programmatically:
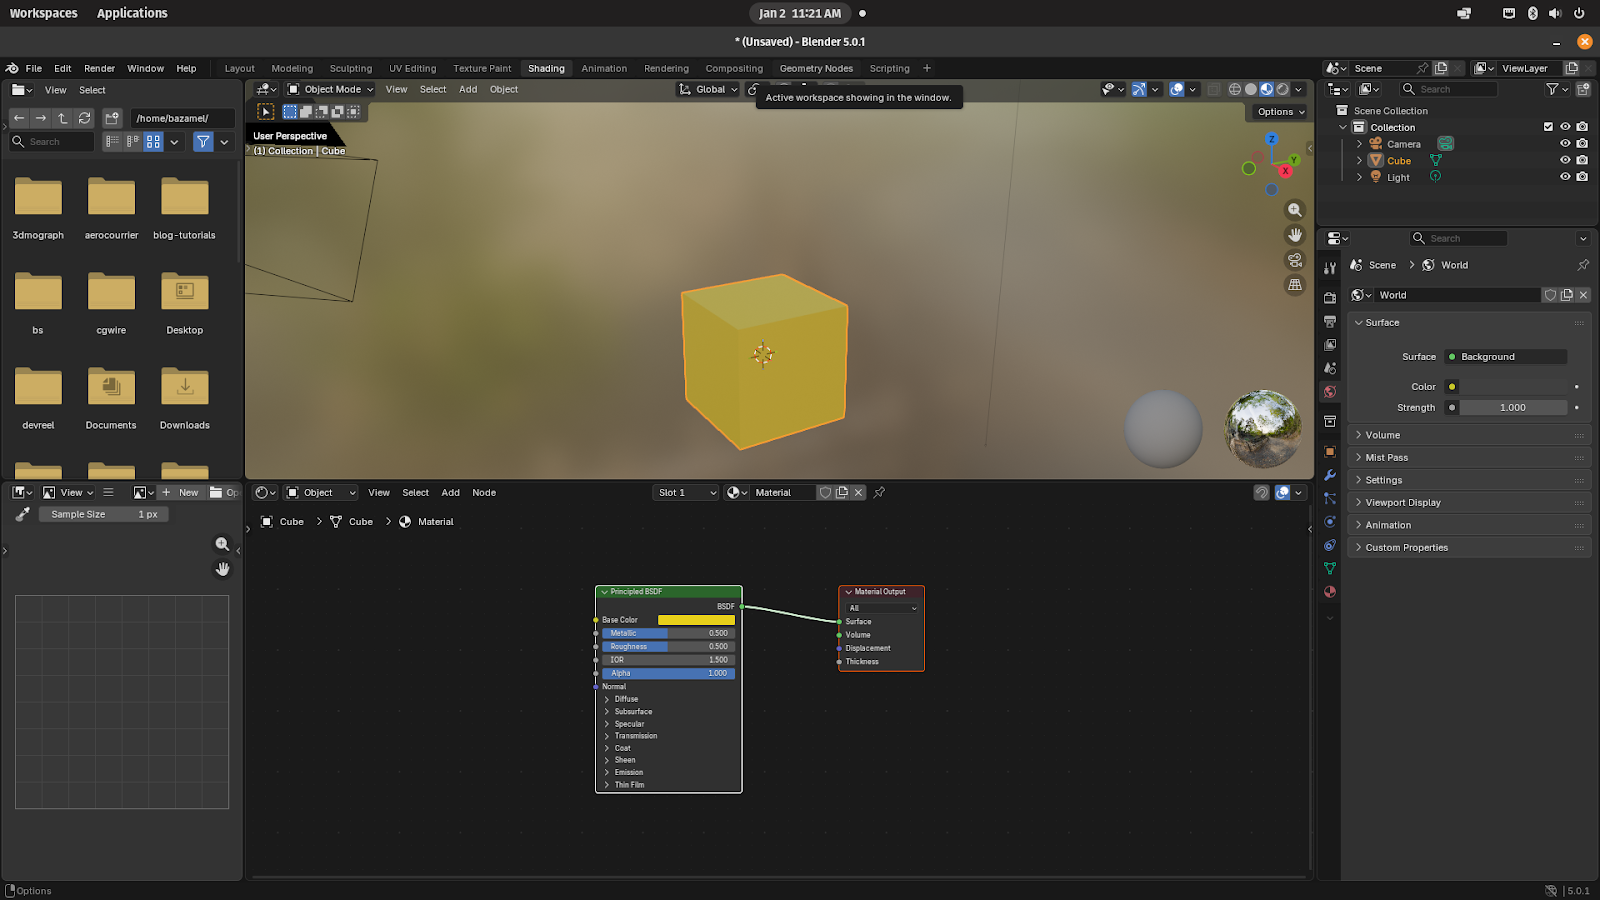
    node_output = nodes.new(type='ShaderNodeOutputMaterial')
    node_output.location = (400, 0)

    node_principled = nodes.new(type='ShaderNodeBsdfPrincipled')
    node_principled.location = (0, 0)

    node_principled.inputs['Roughness'].default_value = 0.2
    node_principled.inputs['Metallic'].default_value = 1.0
Now, let's make it interesting. We will add a Noise Texture and a ColorRamp to generate a random color pattern.
node_noise = nodes.new(type='ShaderNodeTexNoise')
    node_noise.location = (-600, 0)
    node_noise.inputs['Scale'].default_value = 15.0
    node_noise.inputs['Detail'].default_value = 10.0

    node_ramp = nodes.new(type='ShaderNodeValToRGB')
    node_ramp.location = (-300, 0)

    node_ramp.color_ramp.elements[0].color = (0.1, 0.1, 0.1, 1)

    rand_r = random.random()
    rand_g = random.random()
    rand_b = random.random()
    node_ramp.color_ramp.elements[1].color = (rand_r, rand_g, rand_b, 1)
Finally, we have to wire them together and apply this new shader to the current context (the default cube):
    links.new(node_noise.outputs['Fac'], node_ramp.inputs['Fac'])

    links.new(node_ramp.outputs['Color'], node_principled.inputs['Base Color'])

    links.new(node_principled.outputs['BSDF'], node_output.inputs['Surface'])

    return mat

my_new_mat = create_procedural_material("SciFi_Metal_Random")

bpy.context.object.data.materials.append(my_new_mat)
Copy that code into your text editor and press "Run Script" (the Play button). Look at your active object. It is now a metallic surface with a noise pattern of a random color. Run it again (change the name in the function call), and you get a different color.
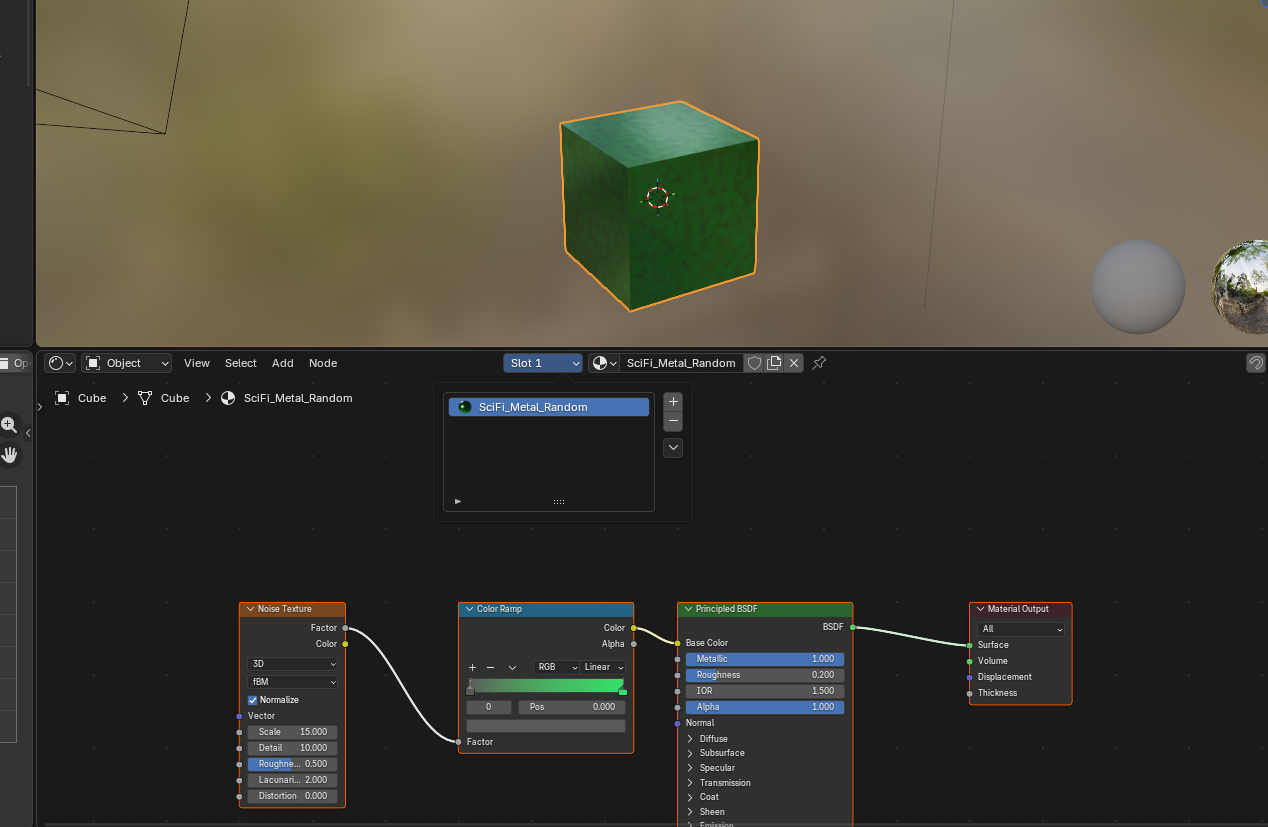
Congratulations, you just created a procedural material generator!
Have a look at our corresponding Github repository to play with the code!
Conclusion
Shaders are more than just coloring within the lines. They are the skin of your digital world. They tell the story of the object: how old it is, where it has been, and what it is made of.
By understanding the logic of shader nodes, you can create anything from photorealistic skin to stylized cartoon fire. And by taking that leap into Python scripting, you unlock the ability to work faster and smarter, automating the tedious parts of the job so you can focus on the art.
But this is just one piece of the puzzle. You can change the surface, but what about the shape? The next logical step in your journey is Geometry Nodes. Just as Shader Nodes control the color and light procedurally, Geometry Nodes control the mesh and structure programmatically. Have a look at our dedicated article to create entire scenes from code!