Learning Blender as a 3D artist usually means learning about its addon ecosystem. Tasks that would take hours like rigging a character can be turned into seconds with addons like Rigify. The same goes for most workflows, and we often end up asking ourselves the same recurring question: "Can Blender do this automatically?"
The answer is yes. The key is the programming language Python.
Blender includes a powerful built-in scripting engine, and with just a few lines of code, you can create objects, position cameras, and even trigger full renders.
You won't need to pay for an addon if you know how to build one yourself. And at its core, an addon is just a script wrapped in a custom Blender user interface.
If you've never scripted in Blender before, discovering the bpy module feels like opening a secret door inside a tool you thought you already knew: suddenly, every part of the interface becomes programmable. You're not just clicking buttons anymore but giving instructions to build repeatable systems.
One of the most important workflows you can automate is rendering. Not only to make your pipeline faster but also to help keep rendering settings consistent and predictable. In this tutorial, we'll implement a basic programmatic rendering system to automatically animate a 3D text and turn it into a full HD video. We'll start from zero, exploring how to run Python for Blender and how to use it to control the scene. By the end, you'll have a good overview of how to automate common animation tasks.
Use Cases
Programmatic rendering unlocks a wide range of powerful workflows that go far beyond traditional manual scene building:
- Data-driven motion graphics — Animated charts, realtime API-driven broadcast graphics, or automatically generated social videos.
- Generative art — Procedural patterns, noise fields, particle experiments, and algorithmic illustrations that evolve from code.
- Batch-rendered variants — Personalized ads, product color variations, automated aspect-ratio crops, and bulk social asset generation.
- Procedural 3D content — Terrain builders, parametric modeling, foliage/world population, and automated 3D asset variations.
- Generative UI & design systems — Dynamic SVGs, templated banners, and brand-consistent graphics rendered on demand.
- VFX and animation scripting — Automated rig controls, crowd systems, particle population, and repeatable simulation setups.
- Simulation visualizations — Fluid and smoke simulations, traffic and crowd dynamics, and scientific or physics-based renders.
Many 3D modeling tasks are repetitive and time-consuming. By integrating them into an automated, script-driven pipeline, artists can focus more on creative worldbuilding while Python handles the tedious parts in the background.
In any case, the development workflow is pretty much the same:
- Setup - define needed input data and scene cleanup
- Geometry generation - modeling the actual assets needed for the task
- Animation - defining the transforms and their associated keyframes
- Output - the desired assets (3D models, video, image sequence, etc.)
This is exactly the path we're going to take for our 3D text video rendering example.
You can find the complete source code for the example integration showcased in this guide on our GitHub:
🔗 https://github.com/cgwire/blender-programmatic-rendering
1. Scene Setup
Before we dive into generating scenes, we first need a clean starting point. When you open Blender, it loads a default scene usually containing a cube, a camera, and a light. For this tutorial, we'll only need the latter two.
The first step in using Blender programmatically is importing the bpy module. This gives you full access to Blender's data, tools, and rendering pipeline directly from Python:
import bpy

bpy.data.objects.remove(bpy.data.objects.get("Cube"), do_unlink=True)
Here, we remove the default Cube object. The do_unlink=True parameter makes sure Blender not only deletes the object but also unlinks it from any scene that might reference it.
2. Manipulating 3D Text
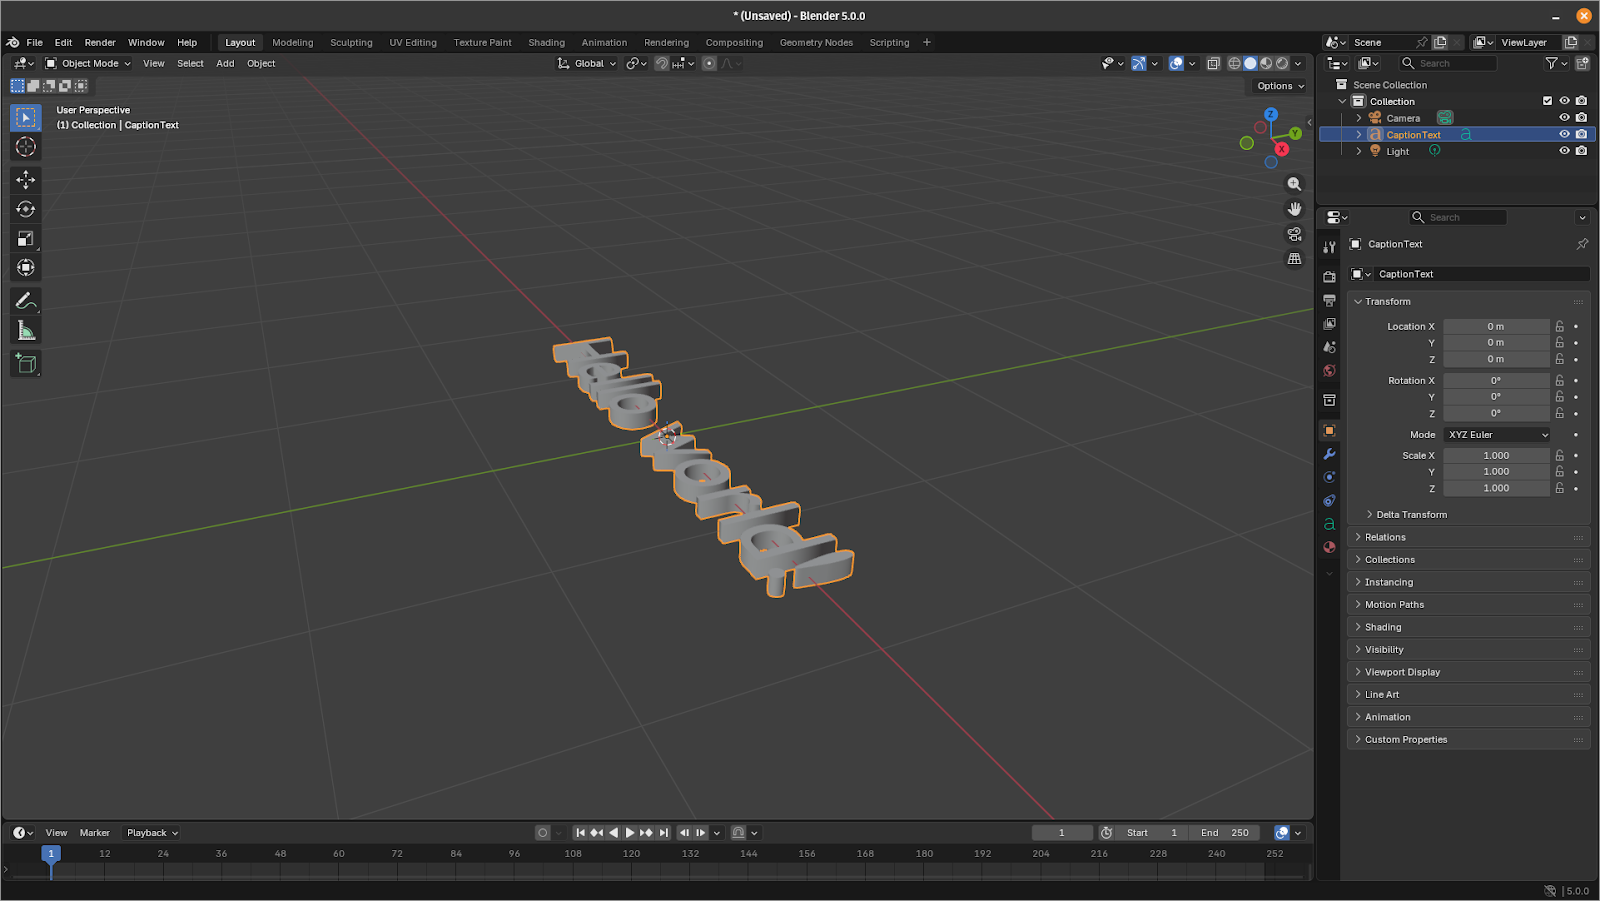
Next, we add a 3D text object to the scene to serve as the core element we'll manipulate and eventually render programmatically.
bpy.ops.object.text_add(location=(0, 0, 0))
text_obj = bpy.context.object
text_obj.name = "CaptionText"
text_obj.data.body = "Hello world!"
This code snippet creates a new text object at the world origin, assigns it a readable name, and sets its displayed text to "Hello world!".
To give the text more presence in the scene, we can adjust its geometry. Increasing the size and adding extrusion make the text fully 3D, and centering it on both axes simplifies future transformations and animations:
text_obj.data.size = 0.6
text_obj.data.extrude = 0.05
text_obj.data.align_x = "CENTER"
text_obj.data.align_y = "CENTER"
With these adjustments, the text is cleanly centered, properly scaled, and ready for further processing.
3. Adding Keyframes
We create a simple animation by inserting keyframes for the text position over time.
First, we move our timeline cursor to frame 1, position the text at the starting location, and record that position with a keyframe:
bpy.context.scene.frame_set(1)
text_obj.location = (-4.0, 0.0, 1.0)
text_obj.keyframe_insert(data_path="location", frame=1)
Next, we advance to frame 40, shift the text along the X axis, and insert another keyframe to mark its new position:
bpy.context.scene.frame_set(40)
text_obj.location = (0.0, 0.0, 1.0)
text_obj.keyframe_insert(data_path="location", frame=40)
With these two keyframes in place, Blender automatically interpolates the movement between them, creating a smooth animation as the text glides into the center of the frame.

4. Video Rendering
All we have left to do is configure Blender's rendering settings and output the final video.
The first choice is which rendering engine to use: Eevee or Cycles.
Eevee is a real-time rasterization engine, making it extremely fast and ideal for previews or stylized animation. Cycles, on the other hand, is a physically based path tracer that produces more realistic lighting but requires much longer render times. For quick iteration and most automated workflows, Eevee is generally the better option:
bpy.context.scene.render.engine = "BLENDER_EEVEE"Next, we specify the output resolution:
bpy.context.scene.render.resolution_x = 1920
bpy.context.scene.render.resolution_y = 1080
Then we set the frame rate and define the animation range. Here, a 60-frame shot at 24 fps:
bpy.context.scene.render.fps = 24
bpy.context.scene.frame_start = 1
bpy.context.scene.frame_end = 60
Blender also needs to know how to encode the final video. We'll export it as an MP4 using H.264 video encoding for rendering speed:
bpy.context.scene.render.image_settings.file_format = "FFMPEG"
bpy.context.scene.render.ffmpeg.format = "MPEG4"
bpy.context.scene.render.ffmpeg.codec = "H264"
Finally, we choose where the output file will be written using the current folder for convenience:
bpy.context.scene.render.filepath = "//render.mp4"With everything configured, we can start the render process with a single command:
bpy.ops.render.render(animation=True)5. Putting it all together
Our code is complete and we just need to put it into a Python file render.py:
import bpy

bpy.data.objects.remove(bpy.data.objects.get("Cube"), do_unlink=True)

bpy.ops.object.text_add(location=(0, 0, 0))
text_obj = bpy.context.object
text_obj.name = "CaptionText"
text_obj.data.body = "Hello world!"

text_obj.data.size = 0.6
text_obj.data.extrude = 0.05
text_obj.data.align_x = "CENTER"
text_obj.data.align_y = "CENTER"

bpy.context.scene.frame_set(1)
text_obj.location = (-4.0, 0.0, 1.0)
text_obj.keyframe_insert(data_path="location", frame=1)

bpy.context.scene.frame_set(40)
text_obj.location = (0.0, 0.0, 1.0)
text_obj.keyframe_insert(data_path="location", frame=40)

bpy.context.scene.render.engine = "BLENDER_EEVEE"
bpy.context.scene.render.resolution_x = 1920
bpy.context.scene.render.resolution_y = 1080
bpy.context.scene.render.resolution_percentage = 100
bpy.context.scene.render.fps = 24
bpy.context.scene.frame_start = 1
bpy.context.scene.frame_end = 60

bpy.context.scene.render.image_settings.file_format = "FFMPEG"
bpy.context.scene.render.ffmpeg.format = "MPEG4"  # container
bpy.context.scene.render.ffmpeg.codec = "H264"
bpy.context.scene.render.ffmpeg.constant_rate_factor = "HIGH"
bpy.context.scene.render.ffmpeg.gopsize = 12
bpy.context.scene.render.ffmpeg.audio_codec = "AAC"
bpy.context.scene.render.filepath = "//render.mp4"

bpy.ops.render.render(animation=True)
Now, run the script to start rendering:
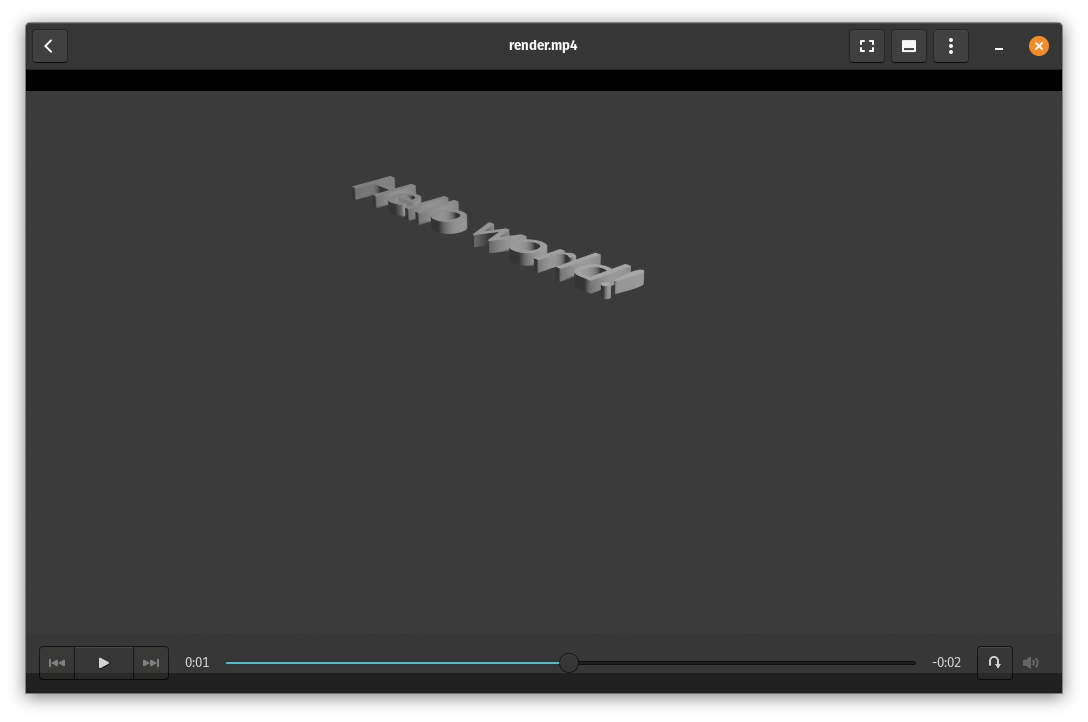
python3 render.pyOnce the render finishes, check your working directory and your fully programmatically generated animation should now be ready to view.
Conclusion
In this walkthrough, you built a complete automated pipeline inside Blender: setting up a clean scene, creating and modifying 3D text, animating it with keyframes, and rendering the sequence with smooth interpolation. All of it handled through Python with no manual adjustments needed!
Now that you've seen how much control the Blender API provides, you can take these ideas much further: automate your workflows, generate graphics from data, build internal tools that assemble scenes, render variations, or create entire animations with a single command... the list to help your animation studio become more productive never ends.