AI tools can now generate 3D models in minutes, but they usually produce messy topology, meaning the way polygons are arranged across the surface is uneven and poorly structured. It might look fine on the surface, but it'll break the moment you start trying to animate it.
If you're doing any kind of animation or rendering, assume you will need retopology.
If you don't know where to start, we've got you covered. In this article, we'll go through the process step-by-step and explain different tools you can use to make it easier.
What's Retopology
For example, we don't usually animate the dense sculpt that comes out of ZBrush directly. Instead, we build a lighter, structured mesh on top of it.
A mesh is a 3D object made of vertices (points), edges (lines between points), and faces (surfaces).
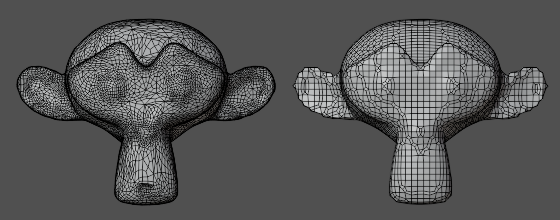
Before we even think about rigging, we inspect the mesh in wireframe mode and identify dense clusters, stretched polygons, and chaotic edge flow (the direction edges follow across the surface).
For a character, for example, we could rebuild the shoulder using evenly spaced quads (four-sided polygons) instead of triangles so that the arm could rotate without pinching. This is retopology.
Why Retopology Is Key
Retopology rebuilds a model's surface with clean geometry, and you need it if you want assets that are maintainable and reusable across productions. Animators don't ship dense sculpt topology downstream. Instead, they rebuild it with clean edge loops so that the next animator or rigger can understand and modify it quickly.
Good retopology also makes animation easier because deformation becomes predictable. Deformation is how a mesh changes shape when a joint rotates, and support it with evenly spaced quads around elbows, knees, and mouths. If you place five to seven radial edge loops around a joint, you give the skin enough geometry to bend without collapsing.
Lastly, controlling polygon density reduces rendering cost. A polygon is a single face of geometry, and more polygons means more data to process, so we usually concentrate on details where silhouettes change and keep flat areas lightweight to cut costs.
Retopology always comes in handy at some point, whether it's to fix a 3D model or create different levels of detail (LOD), so roll up your sleeves and let's dive in.
1. Back Up Your 3D Model
First, it's important you back up your model before you touch retopology, every single time.
Automated retopology tools rebuild topology from scratch, which means they overwrite or delete the original mesh data. It happens artists run an auto-retopo pass at the end of a long day, only to realize the new edge flow breaks deformation around the shoulders and the original sculpt is gone.
Don't rely on undo. Save a clean duplicate of the file and archive the current mesh in your scene before running anything destructive.
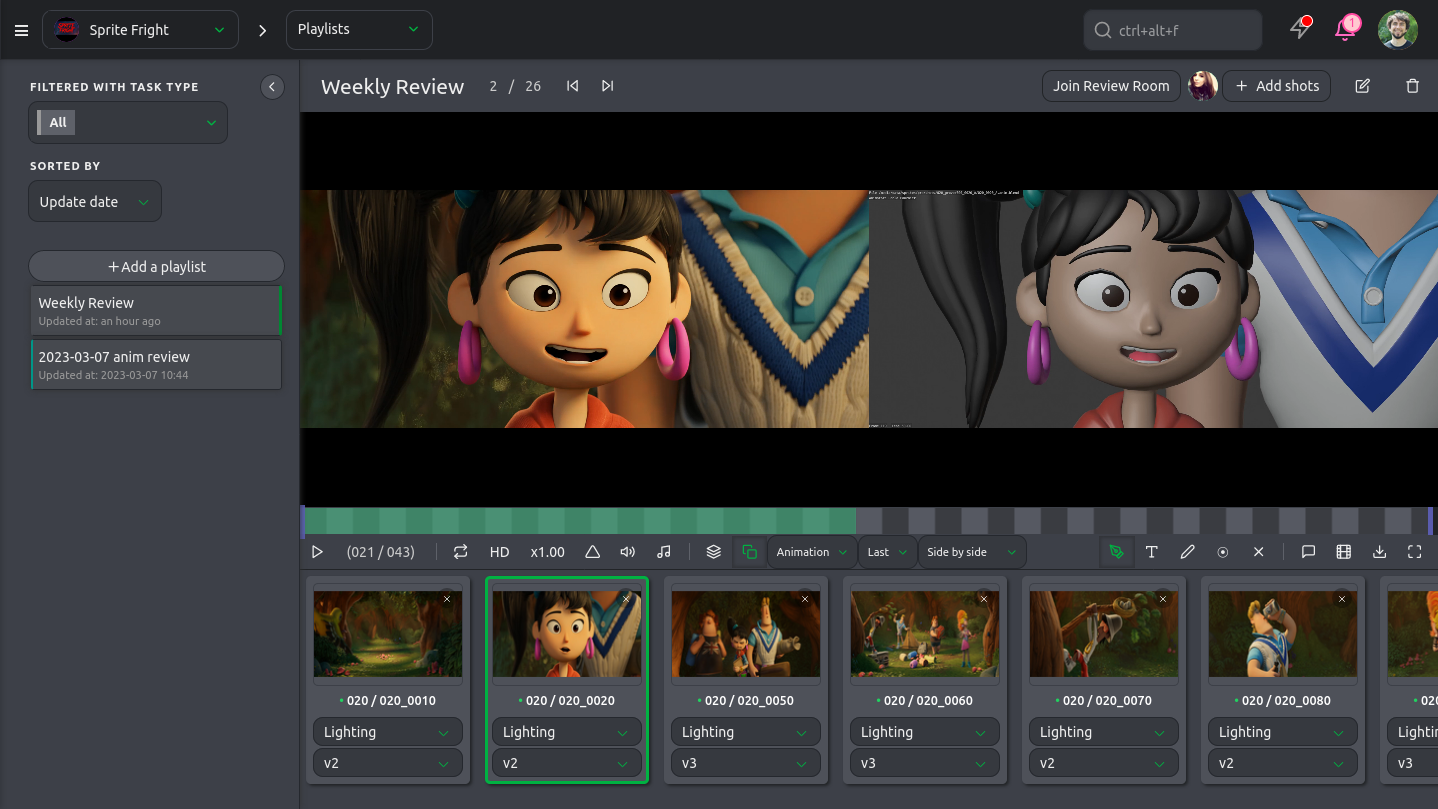
In production, also create a new version in Kitsu to keep changes traceable and recoverable. That way, if the new topology fails in rigging tests, you can roll back in minutes instead of asking IT for a file restore.
Treat backups as part of the retopology process itself! A two-minute version bump and duplicate save can protect days of sculpting and keep the pipeline moving when supervisors ask to compare "before" and "after" meshes.
2. General Process
The general workflow is simple: clean the sculpt, voxel remesh for stability, quad remesh for structure, then manually refine deformation areas like shoulders and hips.
Always test with quick skin weights and extreme poses early.
3. Automated Retopology With Remeshing
If a creature comes in with 8 million polygons and chaotic triangles, we don't start hand-retopo immediately. Instead, we run an automated remesh pass to establish structure first.
To do so, Blender proposes two remeshing algorithms: Voxel and quad.
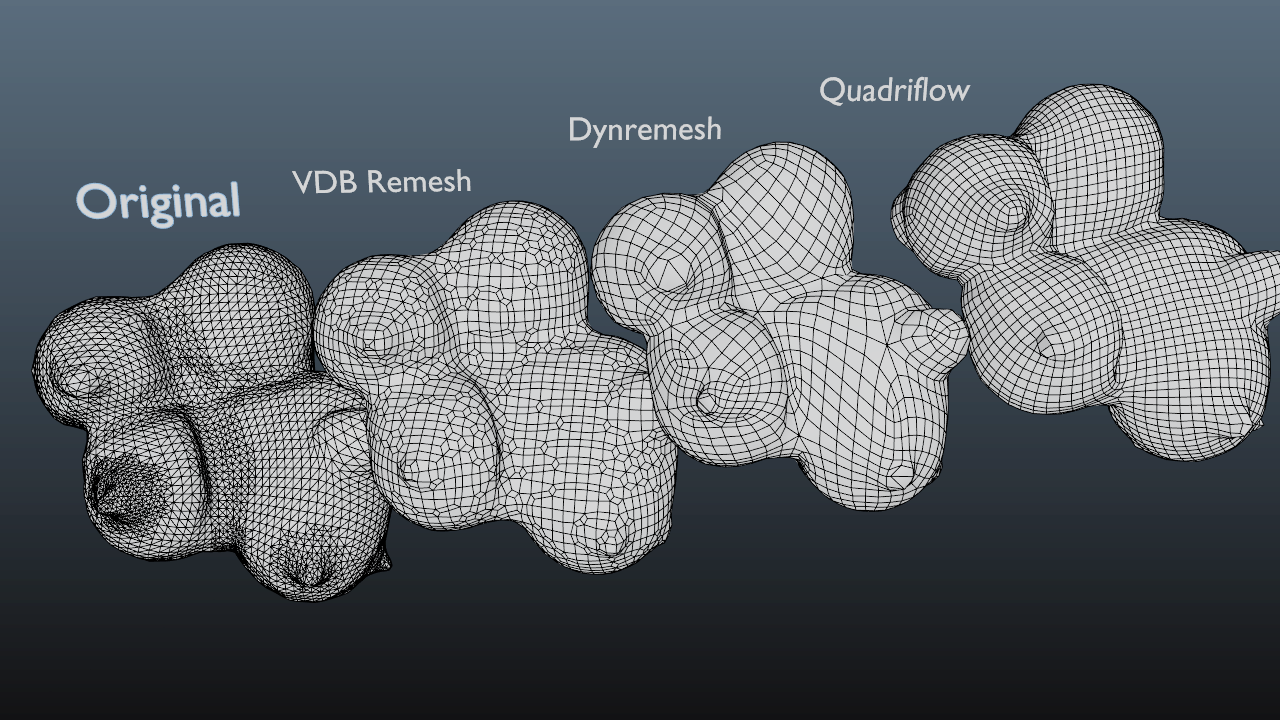
Voxel remeshing (VDB Remesh) works by converting the mesh into a 3D grid of tiny cubes (voxels), rebuilding the surface based on volume rather than original edge flow.
The produced evenly distributed geometry is why it's great for fixing holes, non-manifold geometry (a structure that cannot be unfolded into a 2D plane with consistent surface normals), and intersecting parts. You use voxel when you need a fresh base mesh and don't care much about preserving existing topology, so the result can be messy.
On the other hand, you can use quad remeshing when you want animation-friendly edge loops. Quad remeshing analyzes surface curvature and generates quads which deform predictably under skinning. QuadriFlow follows the shape of your model.
Naturally, you can combine the two. On a facial rig for example, you could ran quad remesh after voxel cleanup, then adjust guides to force loops around the eyes and mouth.
It's important to keep in mind that automated retopology is most often than not a starting point, not a final deliverable.
4. Manual Retopology With Poly Build
Manual retopology with the Poly Build tool is what you reach for when deformation quality is key, especially on hero characters that will carry close-ups.
In Blender, the Poly Build tool lets you draw new polygons directly on the surface of a dense mesh, snapping every vertex to the sculpt.
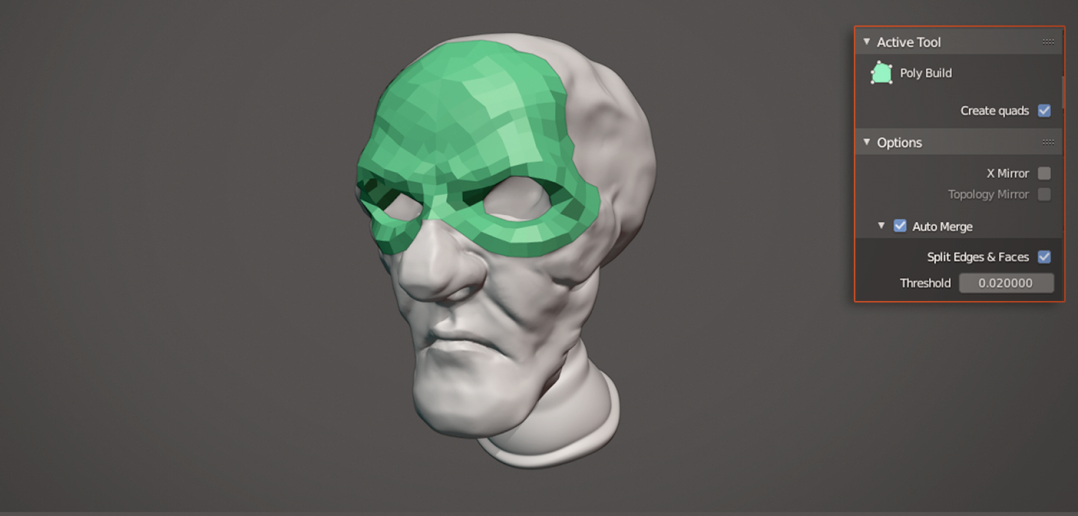
To keep the example of the facial rig, an artist could rebuild the mouth area by placing quads (four-sided polygons) around the lips first to make sure edge loops follow the smile lines. It would give the rigger predictable loops for blendshapes and avoid collapsing geometry during extreme phonemes.
You can also use other modifiers like the Subdivision Surface Modifier or the Multiresolution Modifier to perform specific jobs.
In this step, experience matters a lot. Most animators learn by studying the topology of high-quality models and re-applying the same principles to their own models. It's tacit knowledge, so practice is key!
5. Measuring Retopology Performance
Retopology is all about aesthetics, but it's good practice to measure retopology performance with numbers by counting meshes in your scene. This way you can assess the amount of work a retopology requires and track your progress.
In Blender, open the Outliner and check how many mesh objects are present, then enable Statistics in the viewport overlays to see vertex and face counts in real time.
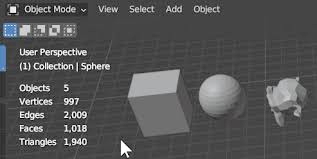
A character model can look light, but the stats could show 120k faces across separate clothing meshes and simply merging static accessories and removing hidden interior faces could drop the count substantially before starting more complex retopology operations.
It's also important to consider separate mesh counts depending on LOD strategies.
LOD, or Level of Detail, means creating multiple versions of the same asset at different resolutions so the engine swaps them based on camera distance.
Reducing mesh count is also about optimizing LOD is about performance at runtime, so we can retopologize key deformation areas like shoulders and hips so the lower LOD still bends correctly during animation without spending too much time on details. Context is important.
Conclusion
AI-generated 3D models have made it incredibly fast to go from idea to mesh. But speed without structure comes at a cost. Clean topology is what transforms a raw, messy asset into something production-ready.
In this guide, we covered what retopology is, why it matters for maintainability, animation, and rendering performance, and how to approach it step by step inside Blender.
You've seen why backing up your original mesh is critical. From there, we explored automated retopology using remeshing tools like Voxel and Quad methods for fast results, as well as manual retopology with modifiers when precision matters most. Finally, we looked at how to measure performance by analyzing mesh counts and understanding the trade-offs between LODs and topology.
Retopology isn't just a cleanup step. And while we demonstrated the process in Blender, the same principles apply across all major DCC tools: whether you're working in Blender, Maya, Houdini, or any other 3D software, the fundamentals remain the same.