The problem is, it’s not as simple as dragging a character’s arm or leg around. Push the limits too far, and suddenly your character’s elbow bends backwards, or their run looks like a broken wind-up toy. Play it too safe, and the movement feels stiff and robotic. Finding the balance between believable physics and expressiveness is hard.
In this article, we explore what kinematics are and how they work in Blender. By the end, you'll have created your first rig for animation.
What Are Kinematics
Kinematics is the study of how things move in space without worrying about the forces that cause the motion. In animation, it means focusing on how a character or object’s joints, limbs, and body parts transform from one pose to the next, rather than worrying about muscles or gravity pulling them.
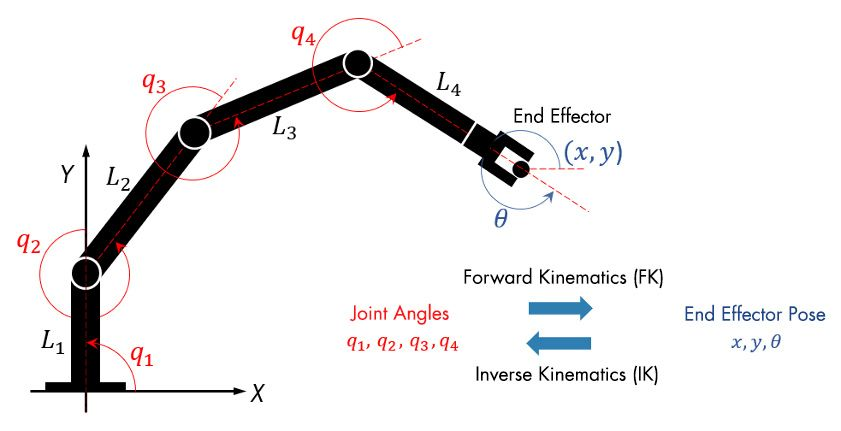
Kinematics gives animators the rules and tools to make 3D models move in a way that looks consistent and believable. It's important to make the distinction between forward and inverse kinematics:
- Forward Kinematics: In FK, motion starts at the top of the hierarchy. If you want to move a hand, you rotate the shoulder, then the elbow, then the wrist. It’s intuitive for arcs and natural swinging motions (like waving or swinging a sword) because you control the chain link by link. But it can be tedious: if you animate a finger touching a point in space, you have to manually adjust every joint to line it up.
- Inverse Kinematics: IK flips the problem. Instead of rotating each joint, you place the end of the chain where you want it (say, a character’s hand on a table), and the computer calculates how the shoulder and elbow must bend to reach that spot. IK is perfect for locked motions, like keeping feet planted on the floor while the body moves. The downside is that it can sometimes create unnatural bends if not carefully controlled, so you'll need to define complex constraints.
Animators don’t choose one or the other exclusively. They switch between FK and IK depending on the type of motion they need: FK for fluid arcs, IK for precise placement, and often blend the two to achieve the most natural end-to-end movement.
Why Kinematics Are Important
Kinematics make sure a character’s movement respects anatomical logic: joints bend the right way, limbs maintain proper relationships, and actions flow naturally. Without it, even the best 3D model will look broken during animation. When a character reaches for a cup on a table, the elbow should bend correctly and the wrist rotate naturally. Without kinematics, the arm would hyperextend, or the hand could twist in an impossible way.
By using forward and inverse kinematics, animators can control complex body parts with far fewer steps. Instead of tweaking every single joint frame by frame, they can pose entire chains at once while reducing posing errors. Instead of manually adjusting the ankle, knee, and hip on every frame, the animator just locks the foot in place with inverse kinematics, and the software handles the rest.
Let's try rigging a simple model in Blender to get a better feel of how it works.
You can find the complete source code for the example integration showcased in this guide on our GitHub:
🔗 https://github.com/cgwire/blender-ik-fk
Forward Kinematics (FK) in Blender
FK is like moving a marionette puppet: You control each string one by one, starting at the shoulder and working your way down to the fingertips. Every rotation builds on the previous one.
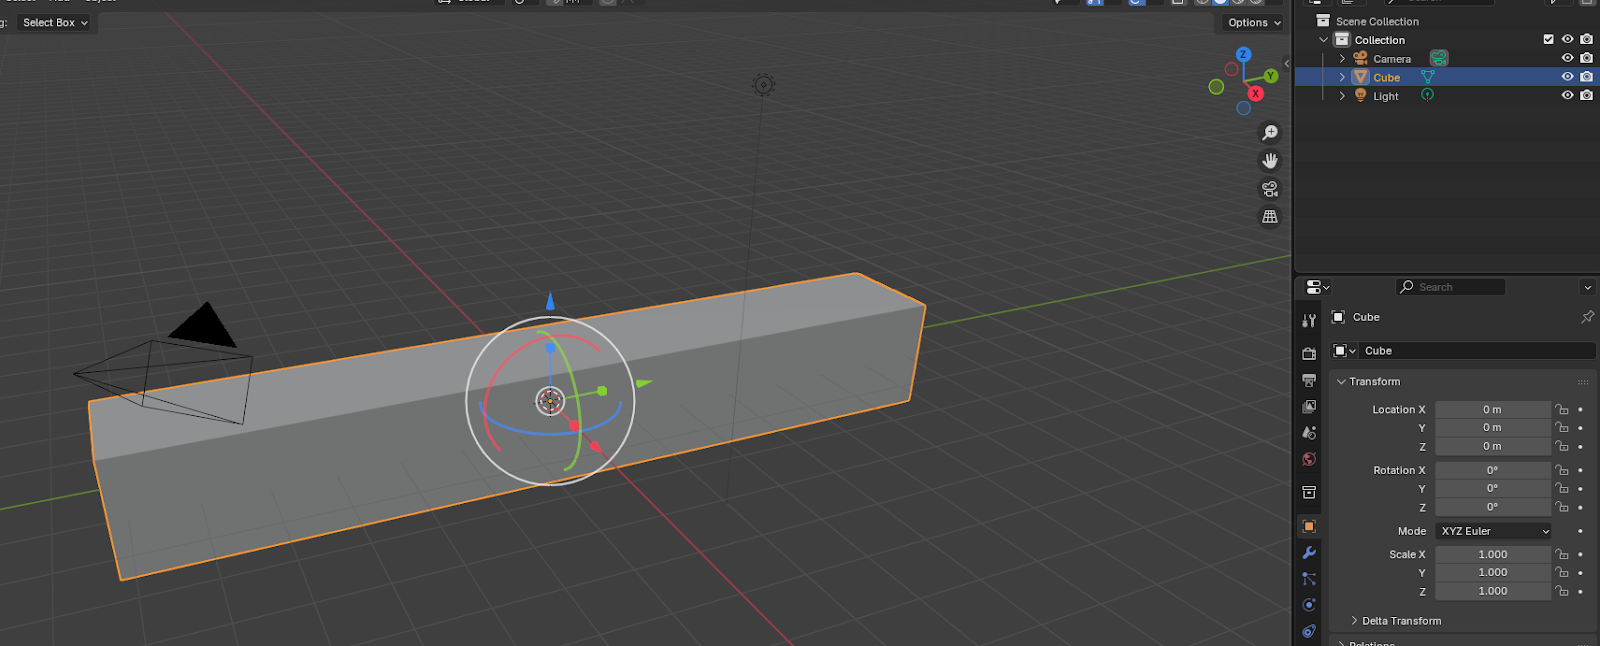
- Add a cube (
Add → Mesh → Cube) and scale it into a rectangular prism. Normalize the scale to 1 for beveling (Object → Apply → Scale).
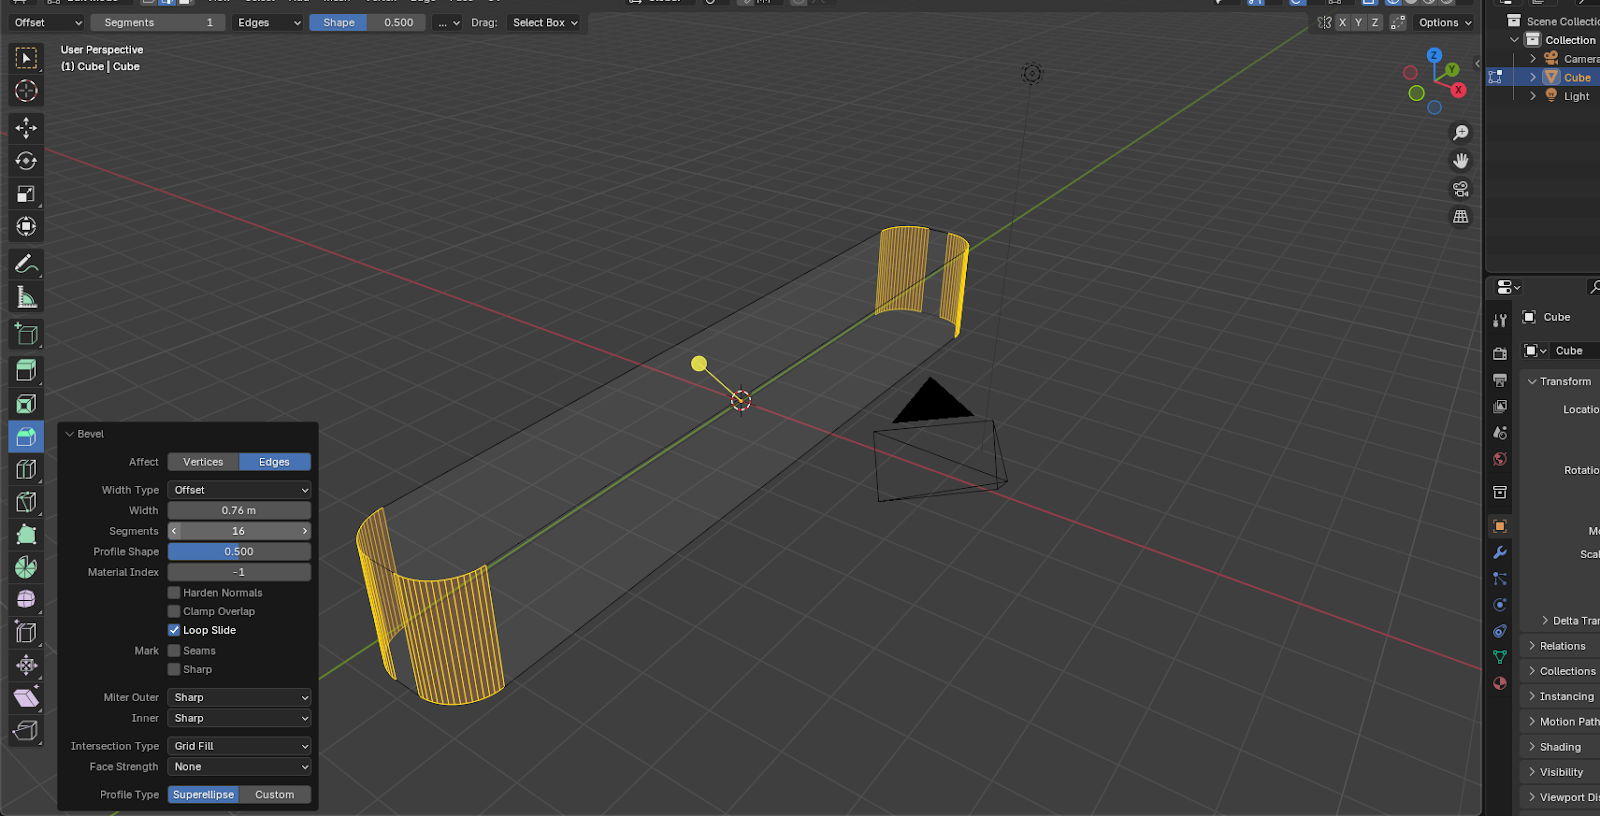
- In Edit mode, bevel the edges to round each side. Make sure to use
Edgemode and select the four edges we need. In the Bevel window that appears, increase the number of segments to create round edges.
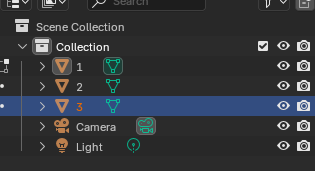
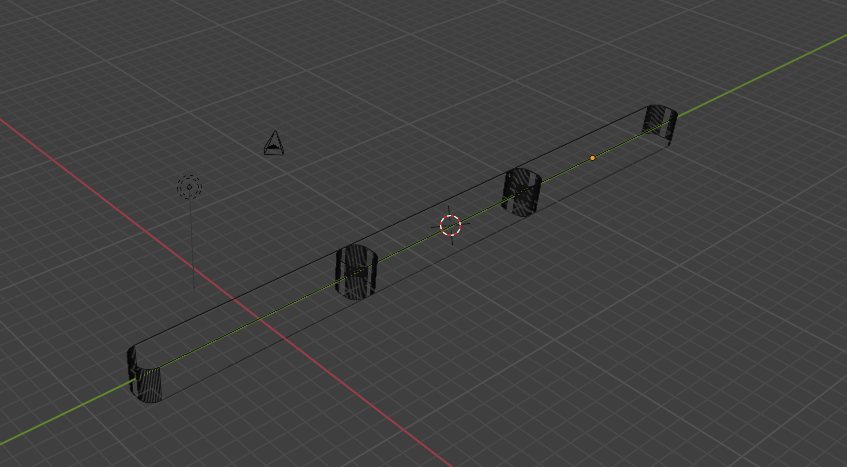
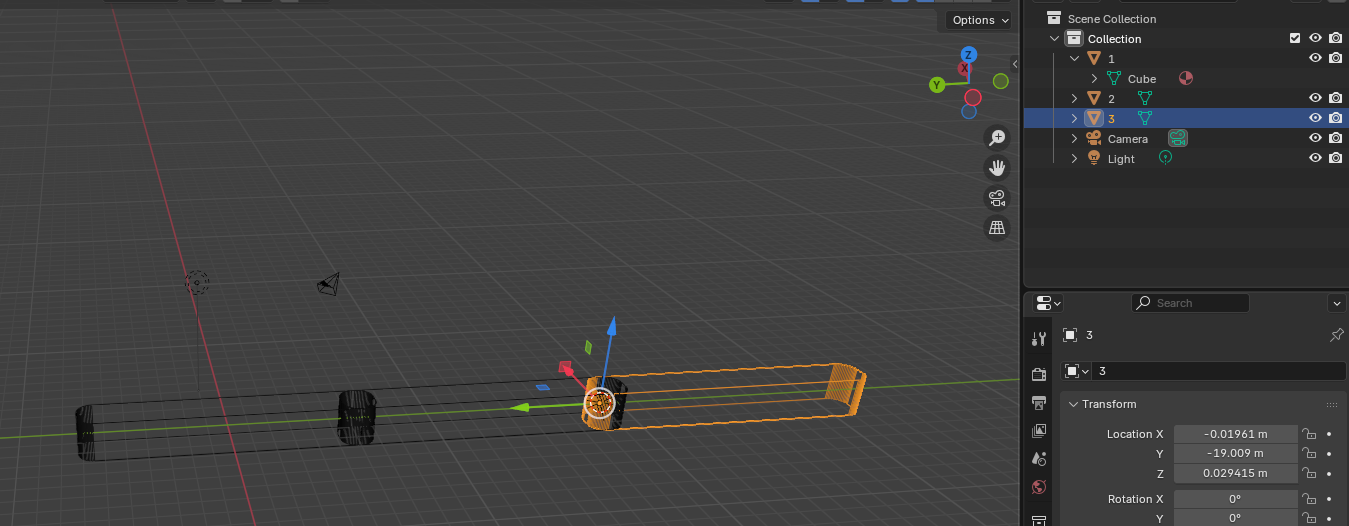
- Make two more segments to create a mechanical arm. In
ObjectMode, select the prism and duplicate. Repeat once more so you have three segments.
- Place the segments along the X axis to create the chain. Try to position them so they can sit end-to-end with a clear joint position.
- Set up the parent hierarchy (FK chain). Build the chain from base to tip. Select the child object first, then put it in the intended parent (the one closer to the base). Repeat so each segment is parented to the previous segment.
- Put each object's origin at its joint. For correct rotation, the origin must be at the joint end of each segment. Use the cursor tool to position the origin. Then, in
ObjectMode,Object → Set Origin → Origin to 3D Cursor. Do this for every segment.
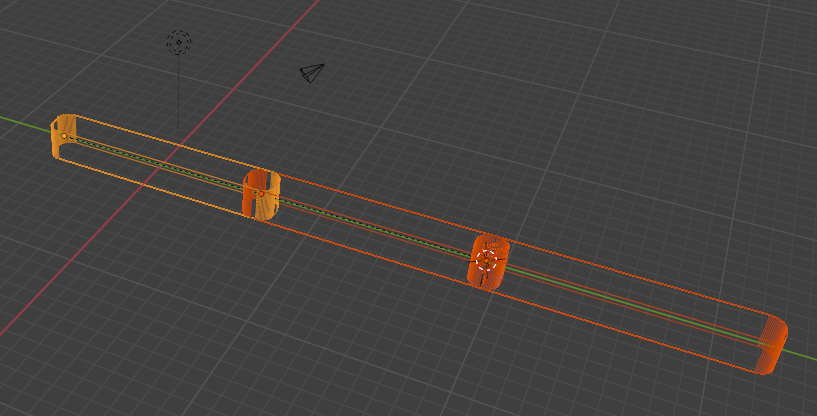
- Give each segment a small default rotation to observe how forward kinematics behave. When you rotate the base (parent) object, the children follow thanks to the parenting chain.
You can then just rotate the arm as you want, keyframe the position, and render the final result to get an animation!
As you can notice, FK is great for smooth, arcing motions like waving, swinging a bat, or dancing.
For more advanced rigs (IK, controls, constraints), Blender animators use an Armature instead of object parenting.
Inverse Kinematics (IK) in Blender
IK is more like controlling a puppet's hand, and the arm figures out how the elbow and shoulder should bend to follow along.
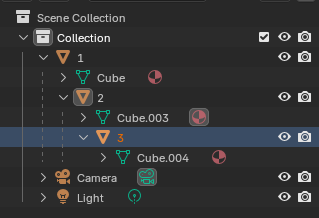
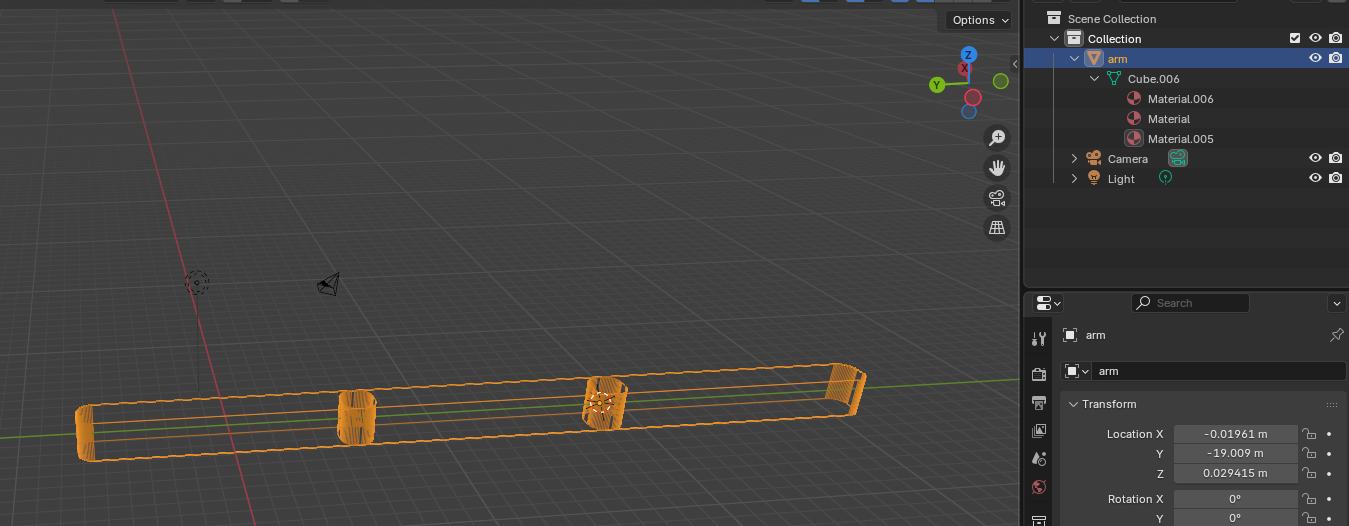
- Duplicate the FK arm mesh. Select your three-segment FK arm, duplicate it with and move it aside so you keep the FK version for comparison.
- Merge the segments into one object. Select the new arm copy and join each segment into a single mesh (
Select all → Object → Join). Now you have one continuous object representing the whole arm.
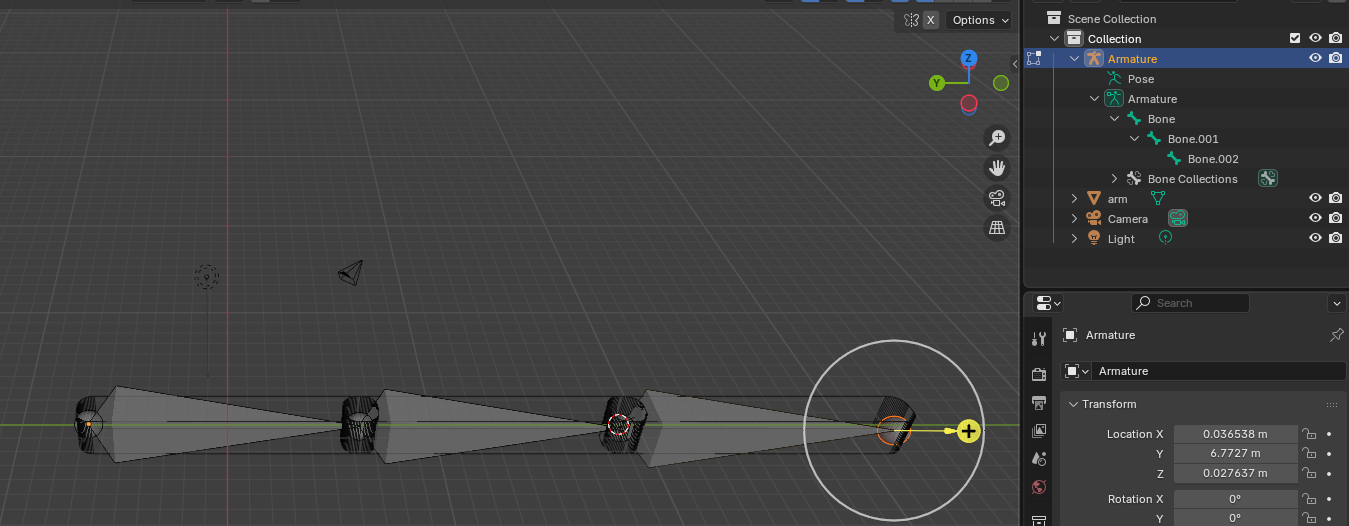
- Create an armature chain. Add an Armature in
Add → Armature. In the Armature’s Edit Mode, extrude bones to match the segments. Select the tip of the first bone to extrude and place it at the elbow. Extrude again for the "hand".
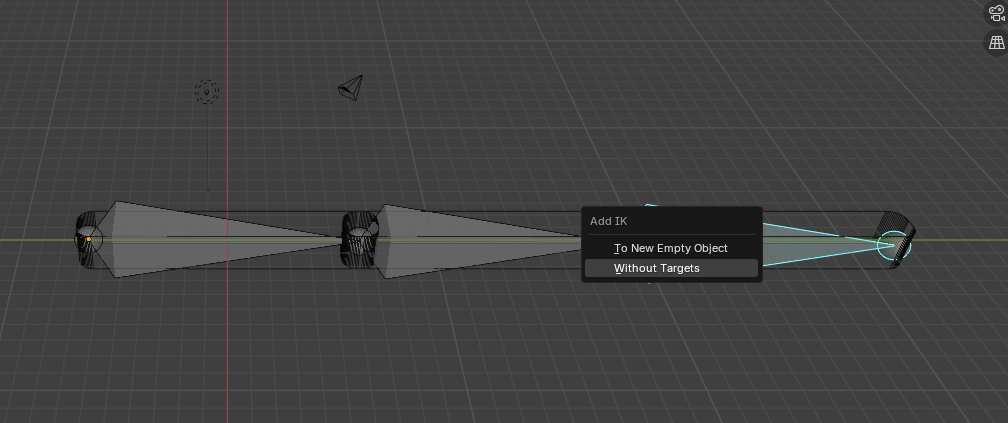
- Add the IK controller. Switch to Pose Mode andI select the hand bone. Press
Shift+I → Add Inverse Kinematics → Without Targets. The IK chain will now drive the arm. In the Bone Constraints tab, set Chain Length = 3.
- Bind the mesh to the armature (skinning). In
Objectmode, select the mesh first, then Ctrl-select the armature. Right-click on the objects and selectParent → Armature Deform → With Automatic Weights. Blender assigns vertex groups for each bone so the arm follows the rig.
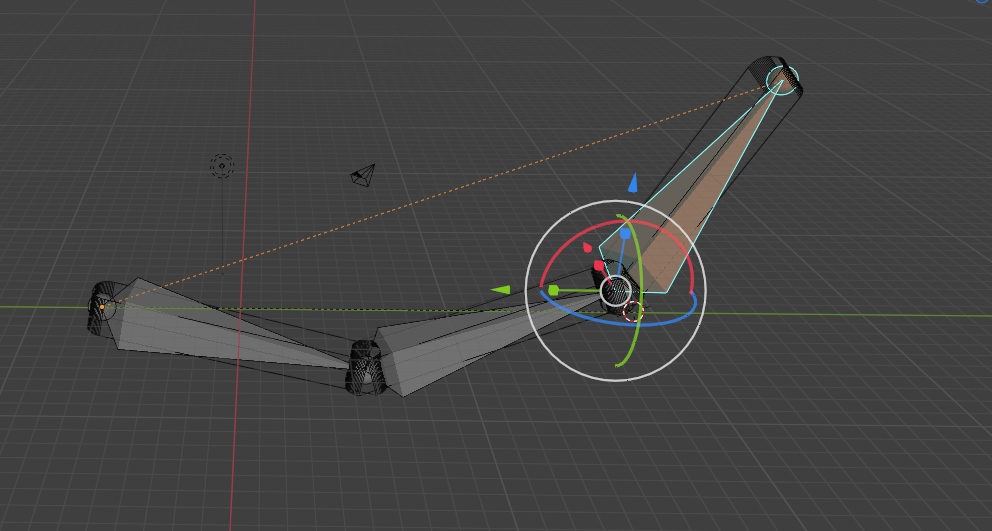
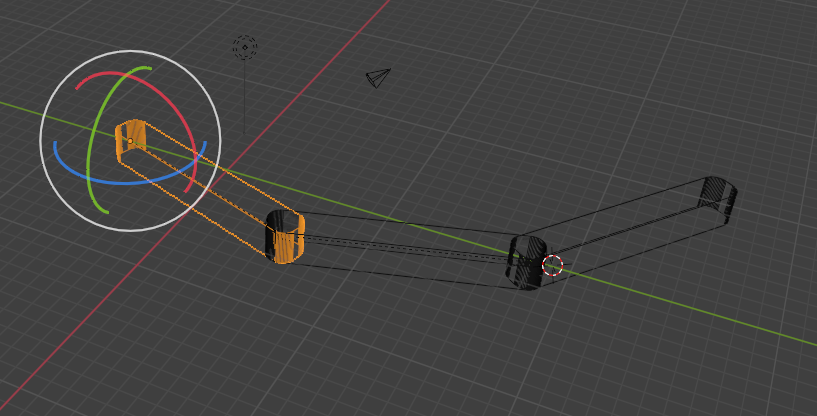
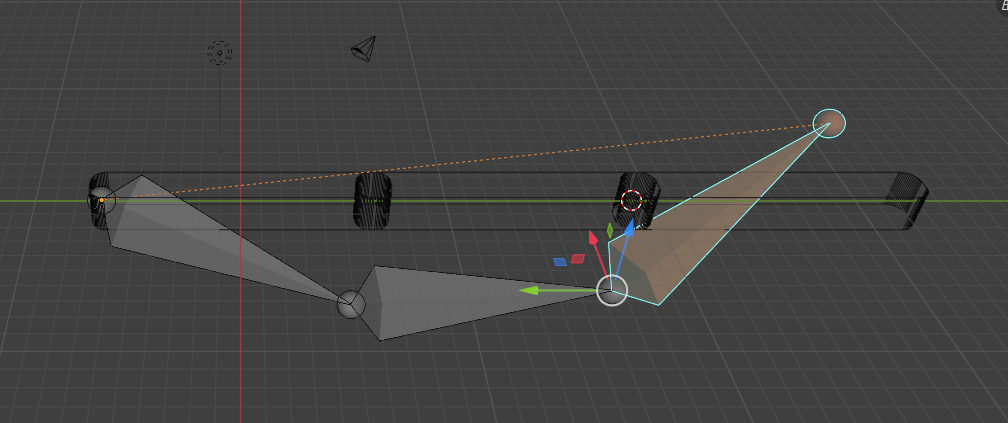
- Animate with IK. Go to Pose Mode, grab the IK controller bone and move it: the whole arm follows naturally!
You can still use FK by moving the bones in the parent chain.
Note that the mesh deforms this way by default. You’ll need to add Bone Constraints to match the desired movement like only allowing the arm to move along a single axis to match the behavior of a mechanical arm.
FK/IK Switch
Most rigs in Blender use a hybrid system: FK for flowing arcs and IK for fixed contact. Typically, an animator starts with FK for broad, gestural posing, then switches to IK for moments of contact or precise positioning.
In more advanced rigs, Blender animators create a custom property (usually a slider or toggle in the N-panel or on a controller bone) to switch between FK and IK.
This is out of the scope of this article, but it is important to keep in mind.
Conclusion
Kinematics is the basis of rigging and skinning, and what separates a stiff 3D mannequin from a character that feels alive.
Forward kinematics gives you smooth arcs and natural flow, while inverse kinematics locks your character to the world with believable contact.
But don’t just read about it, open Blender, grab a model, and start playing! A well-built rig doesn’t just connect bones: it defines how a character moves, poses, and interacts with the 3D world.