And so is darkness. 🌃
In Disney's "The Lion King", the warm glow of a sunrise signals new beginnings with the birth of Simba, while the eerie shadows of a moonlit night in A Nightmare Before Christmas build mystery and romance.
In animation, light isn't just a means to see―it is the very language of the story that guides emotions.
In this article, we explore the creative process behind lighting in animation. From the scene's look to the color nuances polished in post-production, you'll discover how each beam, shadow, and color choice plays a pivotal role in storytelling.
What's Lighting
Lighting in animation refers to simulating light properties―reflection, refraction, shadows, etc.―in a scene to alter the visual storytelling.
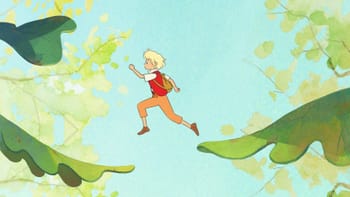
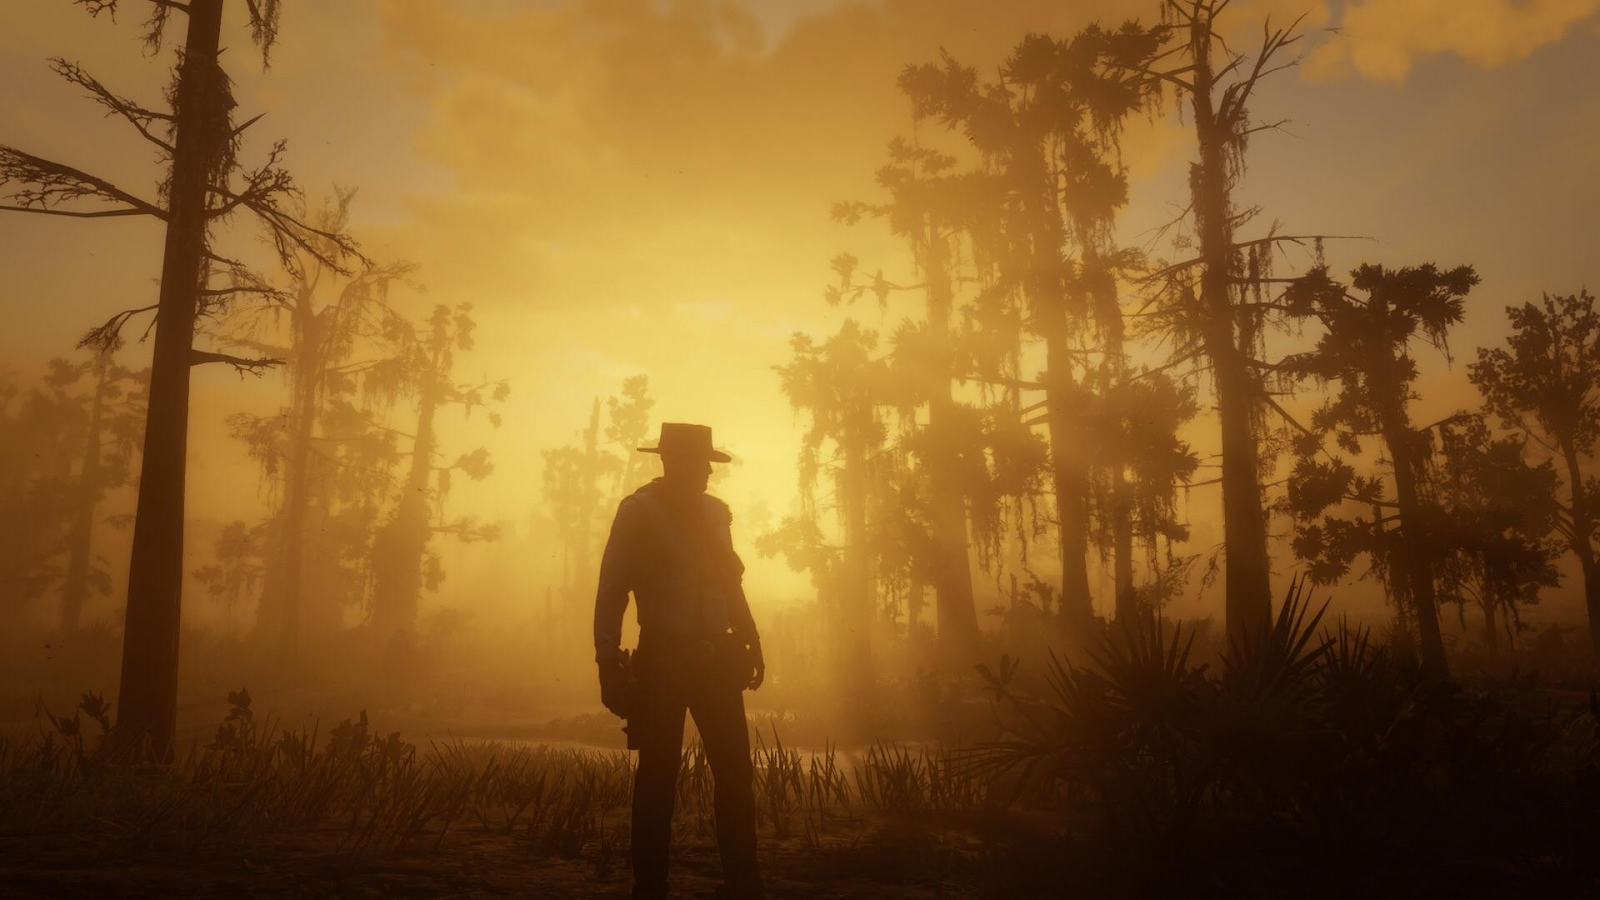
Lighting sets the tone and mood of a scene. Different lighting techniques evoke emotions like tension, happiness, sadness, or fear to create an atmosphere. For example, soft, warm lighting creates a cozy and inviting scene, while harsh, stark lighting suggests a feeling of discomfort or suspense.

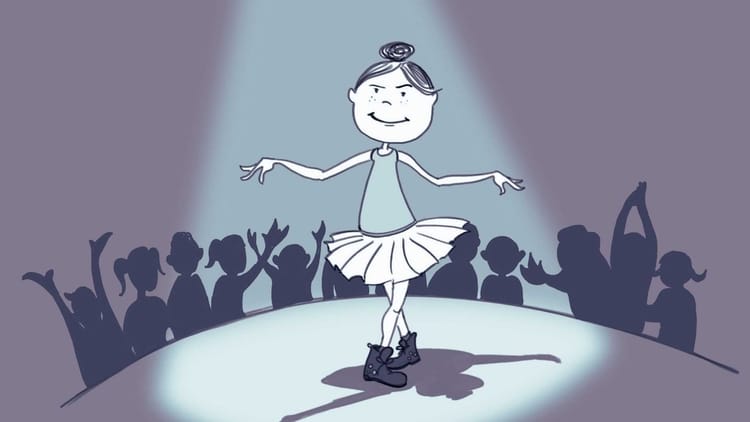
Lighting also guides the viewer's eye towards the most essential elements of a scene. Characters, actions, and important details must stand out from the background, and good lighting design emphasizes the focal points and maintains visual hierarchy to make it easier to follow the story.
Shadows, highlights, and gradients enhance the perception of three-dimensional space within a two-dimensional medium by simulating the physical interactions of light with objects.
The lighting process starts in pre-production, during the concept development phase.
1. Look development
Look development focuses on defining the project's visual style, including lighting.
Identifying key scenes that would benefit from specific lighting effects or atmospheres implies understanding the animation's narrative, mood, and tone, which can only be achieved by thoroughly reviewing the script and storyboards. For example, a dramatic confrontation may call for stark contrasts and deep shadows.
Creating color palettes or mood boards is beneficial for visualizing the intended lighting schemes for various scenes or sequences. These tools are visual guides throughout production, outlining color palettes and light intensity. A mood board, for example, may include images that represent the desired emotional impact of a scene to influence lighting choices.
Research is also a critical aspect of this creative process. Understanding different lighting conditions—like the time of day or weather effects—decides how to best illuminate scenes: a stormy night would require darker values and dramatic lighting to evoke tension.
A solid grasp of real-world lighting principles is necessary. Studying how light interacts with surfaces, casts shadows and defines form will allow animators to create believable and immersive environments. In 3D animation, shaders play a pivotal role in texturing, and animators can rely on them to handle complex lighting effects.
2. Lighting Tests
Once you have a clear vision, the next step is to conduct test renders―low-resolution renders to evaluate how different lighting setups affect the overall appearance of the scene. You can experiment with various light sources like point, directional, and ambient lights to see how they interact with the animation's textures, colors, and forms. For example, simulating the interplay of light and shadows on a character's face can dramatically alter the viewer's perception.
A lighting rig is a configuration of lights strategically set up in a scene to achieve cohesive illumination and shadow play by adjusting intensity, color temperature, and position to explore how different setups evoke distinct atmospheres. A character in a bright, happy environment may be best served by soft, diffused lighting.
Like most tasks in animation, incorporating iterative feedback is key throughout the process. Review renders with a critical eye and regularly gather inputs from peers or directors to fine-tune the lighting.
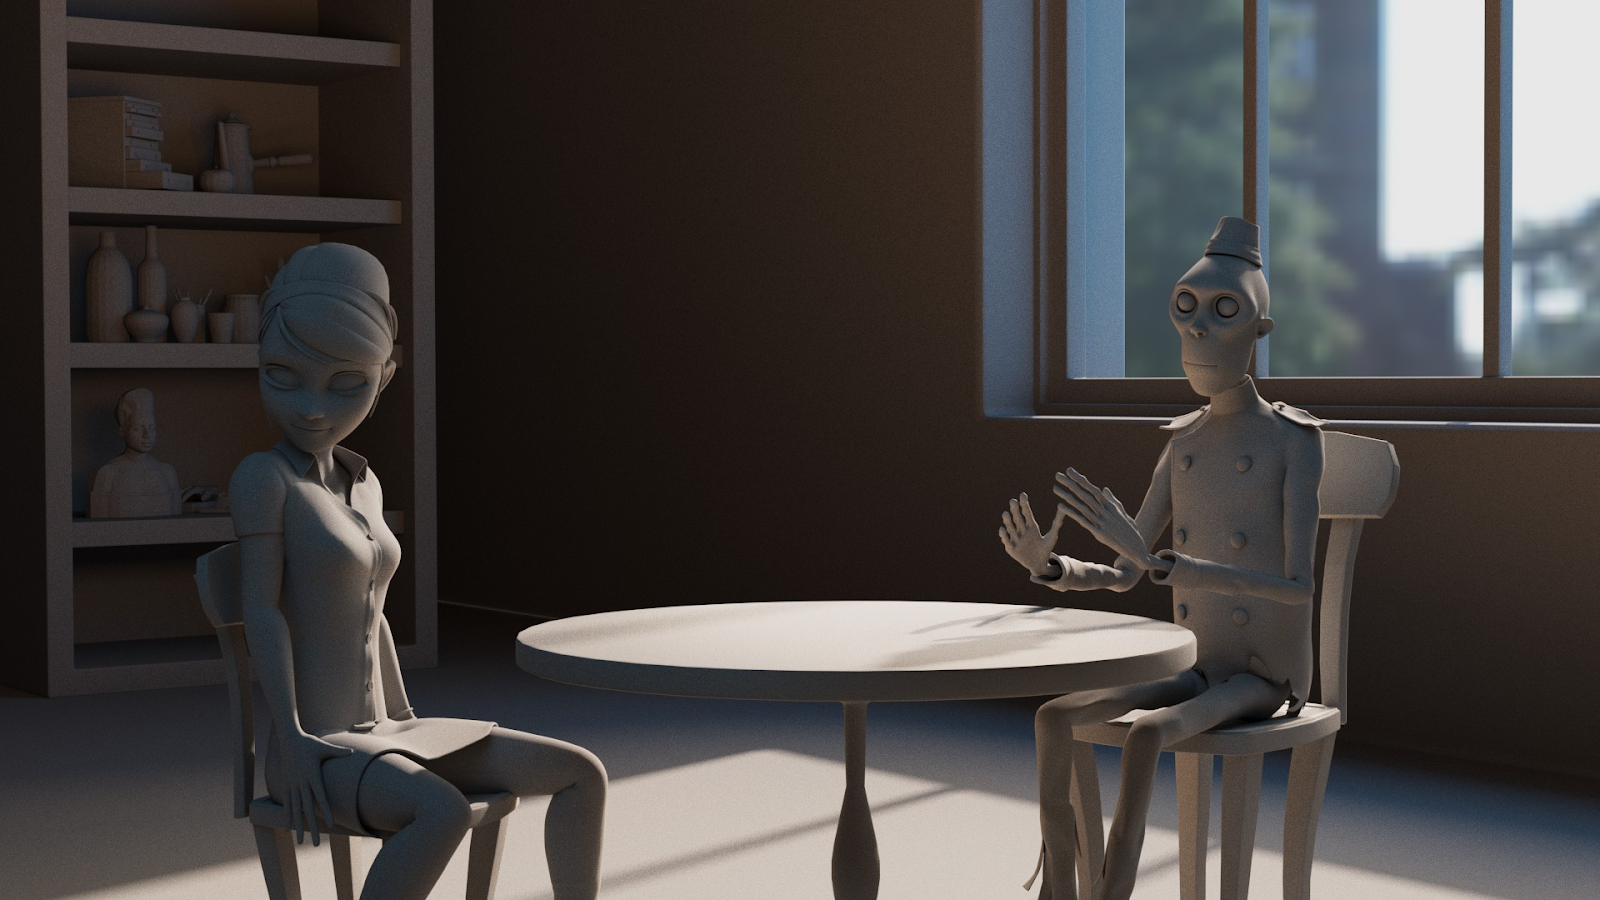
3. Scene Preparation
Pre-production is now over, and it's time to establish the digital environment according to the layouts specified by the layout artists.
These layouts are blueprints detailing the scene's spatial arrangement of characters, props, and backgrounds.
Lighting artists translate these layouts into their digital content creation software to visualize how lighting will interact with 3D models.
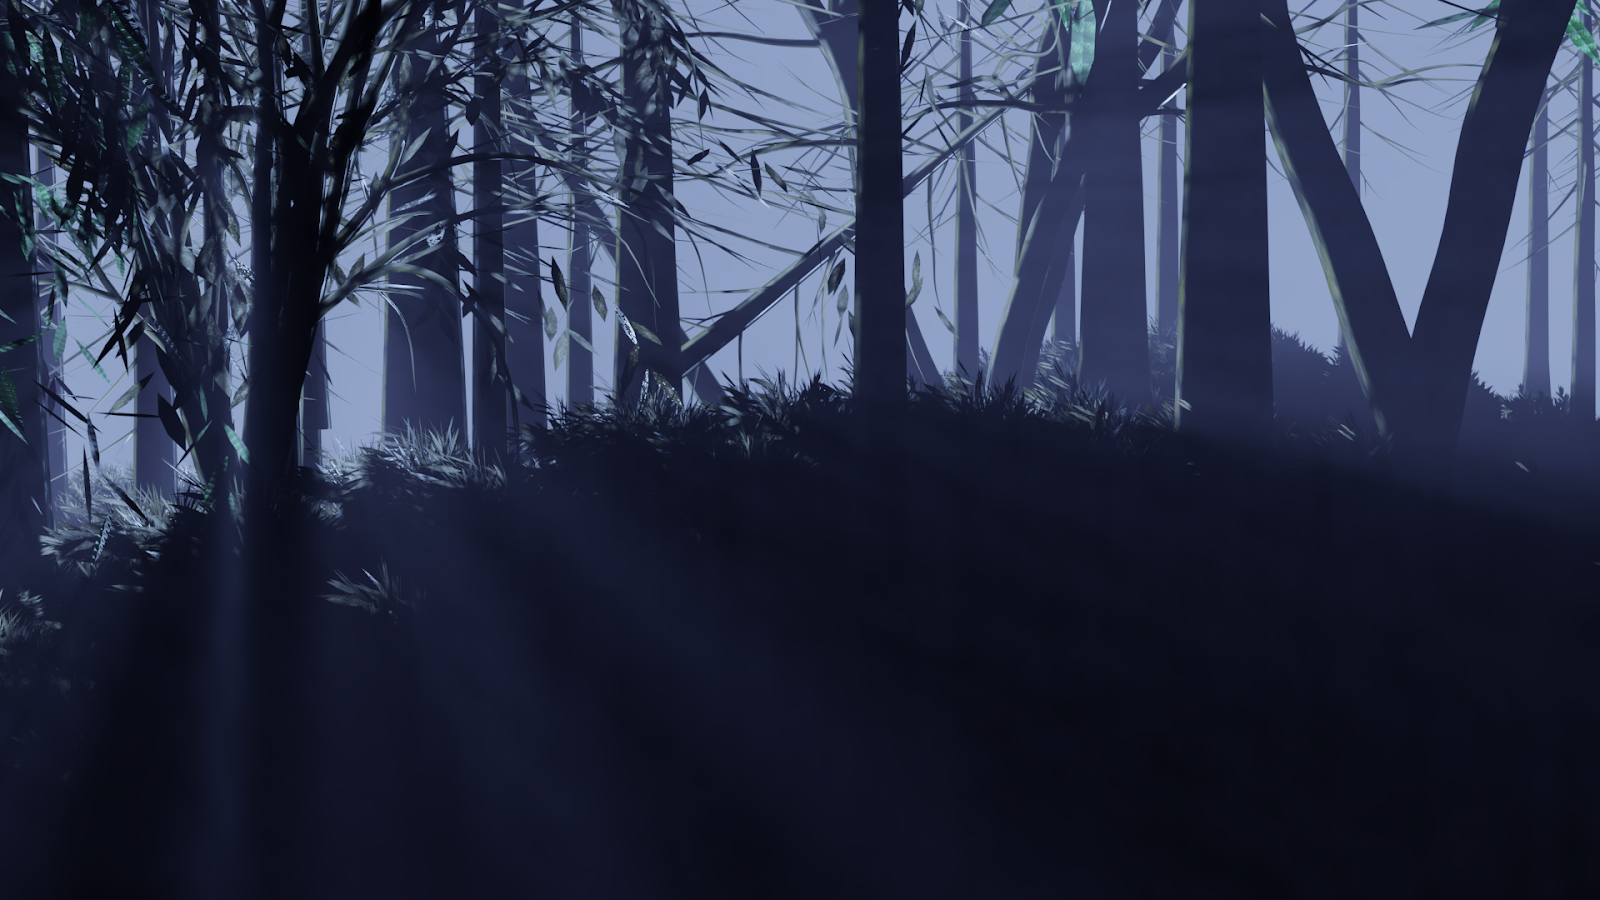
Take, for example, a scene set in a forest; the layout must reflect the depth of trees, the positioning of characters, and the associated props to ensure that lighting effects convincingly enhance the atmosphere.
The lighting must consider both the objects' proximity and the angles of interaction to maintain realism.
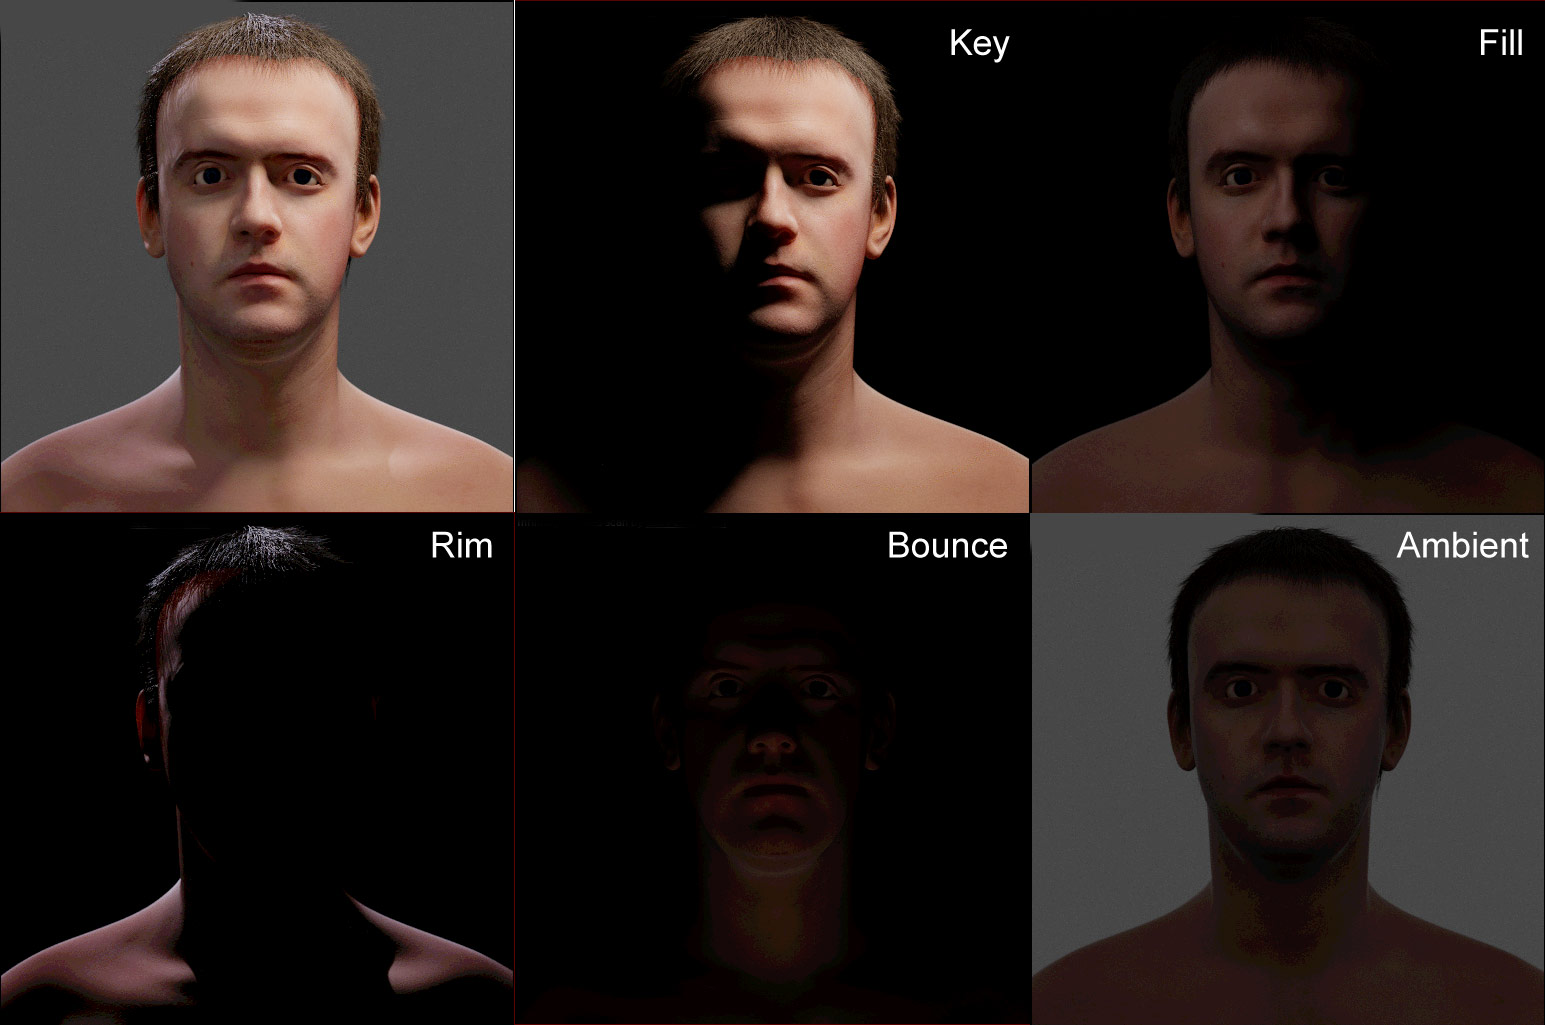
Different lights, like key, fill, and rim, must be strategically positioned within the scene to create the desired mood and tone.
Key lights are the primary illumination source, while fill lights soften shadows and add depth. Rim lights can create a separation between characters and their backgrounds, enhancing depth perception and the overall composition.
Adjusting intensity, color, and shadow properties to fit the scene's environment best is crucial.
Advanced lighting tools like High Dynamic Range Imaging (HDRI) maps can provide more realistic environmental lighting depending on the project requirements.
4. Rendering
Like during pre-production, conducting multiple test renders using low-resolution settings is essential to quickly iterate and refine their lighting setups without the time-consuming burden of high-resolution renders.
Providing test frames or sequences for review by the director and other stakeholders is also important to avoid re-rendering. These reviews should highlight different aspects of the lighting, including the mood, atmosphere, and character visibility.
The consistency and continuity of lighting across shots and sequences is fundamental to maintaining a coherent visual narrative. Careful attention must be paid to the lighting conditions in each frame, especially when transitions occur between scenes or characters move between different environments.
As the project nears its end, you'll set up the final render settings for production-quality outputs like optimizing resolution, anti-aliasing settings, and color depth to ensure the final product meets the highest visual fidelity standards.
5. Post-production
The post-production process largely includes closely collaborating with the compositing team.
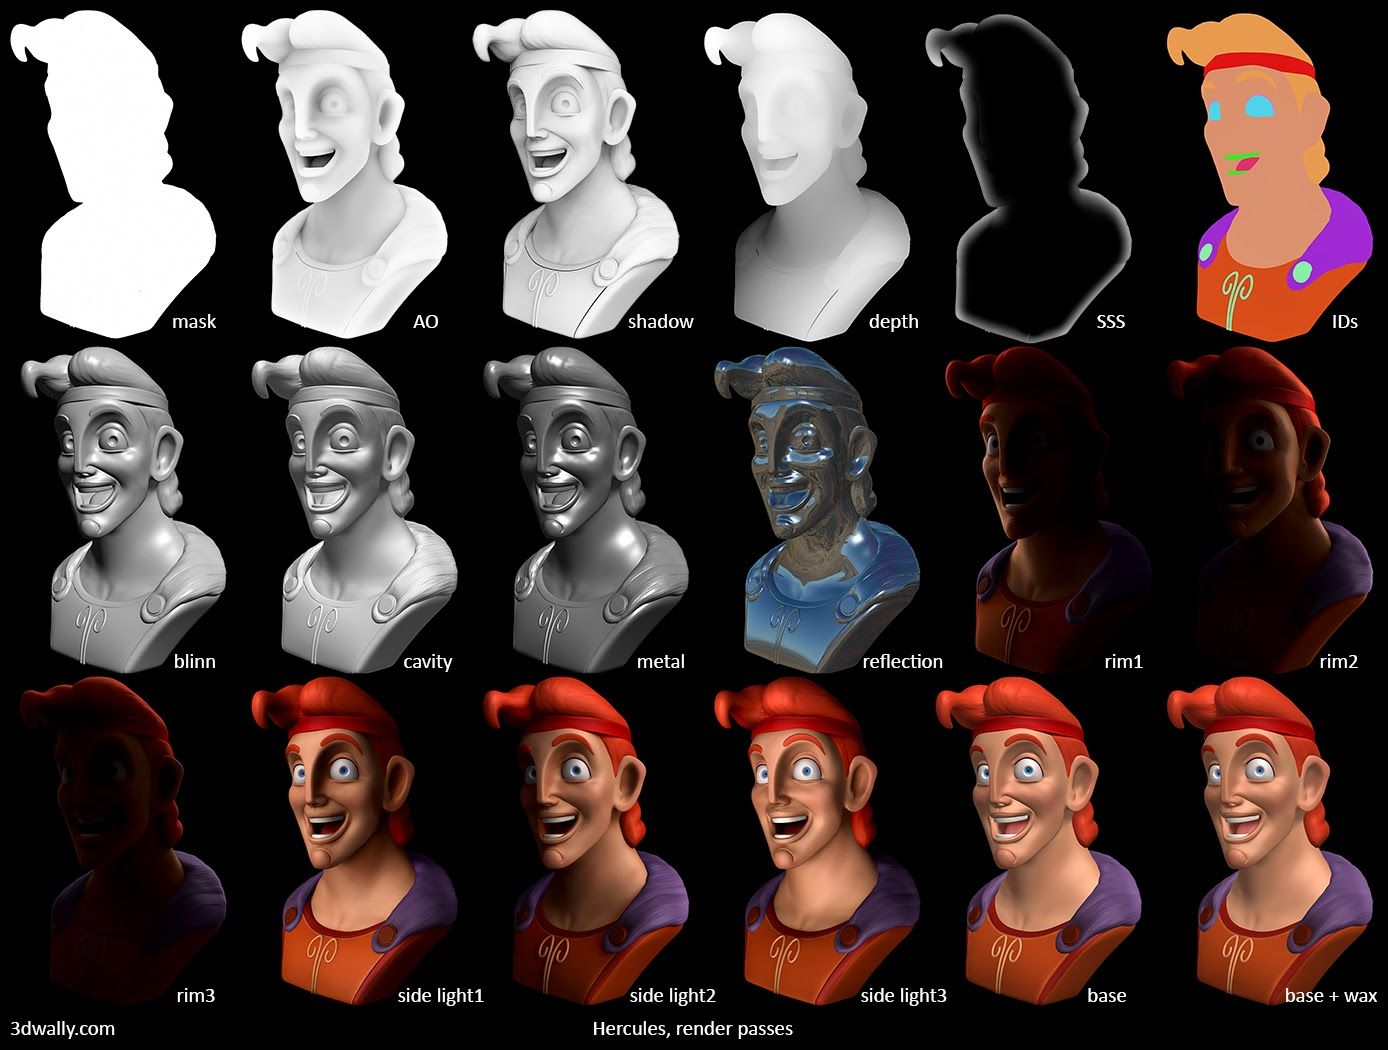
Various render passes must be integrated into the final frames, such as diffuse, specular, shadow, and ambient occlusion, to allow flexibility in adjusting the lighting effects and ensure that each element is in harmony with the overall scene.
Compositing software is essential for fine-tuning the final image. Visual artists can improve the initial lighting effects by adding layers of subtle highlights or shadows to add depth.
Working with colorists is also key to achieving the desired color balance and contrast. A well-executed color grading process can unify the lighting across various scenes while giving a production a signature tone.
Lastly, the team reviews final renders for any lighting inconsistencies or technical issues in the post-production pipeline. Maybe a complex render didn’t finish correctly, or a key light suddenly jumped from one end of the scene to the other. This quality control process safeguards the animation's outcome.
Conclusion
Lighting in animation is about more than just illuminating a scene―it's about creating an immersive world that speaks to the emotions and story at its core! Every step, from look development to post-production, plays a key role in bringing stories to life.
Next time you watch an animated film or series, pay attention to the lighting artists' work and how the light influences a scene.